Showing posts with label Sally Hansen Insta-Dri. Show all posts

Friday, 27 September 2013

33 Day Challenge: Tape Mani

Don't forget to enter our giveaway here!

A tape mani was my introduction to nail art about 15 years ago and I haven't looked back since. They're easy, quick and the amount of designs that can be created is endless. I even created my first post for this blog with a tape mani. I know I've had to restrain myself from creating 33 different tape manis for this challenge and just sticking to it when absolutely necessary. Luckily for me, the third prompt called for a tape mani. Yay!

I wanted to create a skittlette manicure using Maybelline Color Show Sequins in, er, Sea-Quins as a base and Models Prefer in Midnight Madness. There's a bit of a story about Sea-Quins after the page break but I'll explain how I did the mani first. I started with two coats of Sea-Quins, topped it off with two coats of The Awesome Topcoat to make the glitter smooth, taped my middle and ring fingers and applied one medium coat of Midnight Madness. I took off the tape immediately after, let the two fingers dry and finished them with one coat of Sally Hansen Insta-Dri topcoat. 


For my short polish story and a matted version of this mani, click on the page break.


Thursday, 26 September 2013

September Tri-Polish Challenge Day 4

Today is the last day of the September Tri-Polish Challenge and I was tempted to skip this post. I did some sugar spinnning for the first day of this challenge last week  but managed to smudge it badly before it was completely dry. I thought I could try it for the last day of the September challenge and there wouldn't be much problem. I went to work on some sugar spun nails again this morning but they were terrible!!! 

I'm not one to give up easily so I had to come up with a new design quickly. I remembered we could used black, white, silver and gold as well as our three chosen colours. I figured I could use a nail art pen I've had laying around for a while but hadn't used. To be completely honest, I have never tried free hand nail art. Today seemed like a good day to start. 

Here's what I came up with. I used two coats of Essence in Absolutely Blue on my index finger and pinky, two coats of China Glaze in Sweet Hook on my ring finger and one coat of Sally Hansen Insta-Dri in Sonic Bloom on my middle finger and thumb. I then used one coat of OPI Matte Top Coat on all my fingers. This was mostly done for the black nail art pen to grab onto the base as I have found that it slides right of anything slightly smooth. I taped my ring finger off to create the diamond shape using Layla in Metal Chrome. I used the same polish to create two dots on  my index finger and pinky. Then, my masterpiece (Haha! I wish) came to life. I created two diamond outlines using Sally Hansen Nail Art Pen in Black but managed to push it a little to far into the base polishes, which created uneven lines. 


I couldn't quite figure how to take photos of my hands upside down and make them look good so I just flipped my normal pose photos on Picasa. I guess that's a skill I'm gonna have to acquire.


If you've ever used a nail art pen from Sally Hansen, you may know they are basically acrylic paint in a handy package.  If you've used it without a top coat, you'll know they can smudge easily or wash away with some soap and water. I had to bring out my clear top coat to seal it as I wanted to wear this for a few days. I also know the black can smudge quite easily if the top coat is not applied correctly so I dabbed on some Sally Hansen Insta-Drip topcoat finish the mani. Unfortunately, I ended up with bubbles from the thickness of the last coat but it's hardly noticeable in real life.


Putting my rough lines aside and top coats bubbles, I quite like this mani. I'll just have to keep practicing this free handing business.

Check out the other entries to this challenge.


Till next time, 

Laura

Wednesday, 25 September 2013

33 Day Challenge: Most Used Colour Polish

Don't forget to enter our giveaway here!

After some clarification of this prompt, there was no doubt that a red  was gonna be the feature of this post. Before I started blogging, I mostly only wore red and I would get different brands with different finishes to satisfy my cravings for all things carmine. Then one day, when I was holidaying in Melbourne, I came across this tiny little shop (which no longer stands, I almost broke in tears when I found out) for the Australian brand Bloom Cosmetics. They had all their 80-ish colours of nail polish displayed and I was in polish heaven. Being the red lover I was, I picked out Edie, a slighlty-blue red with a buttery formula. It was the perfect red for me and it was sort of like finding the perfect red lipstick but for my nails...  That was in June 2011 and for about eight months after that, I wore it pretty much non-stop. 


Unfortunately, the formula hasn't hold up very well  and it has gotten thick and unmanageable. I added about 20 drops of thinner and the formula was just good enough to paint my nails without having to drag it on the nail bed. At least, I only needed one coat for full coverage. :) Swatch above is done with one coat of Eddie and two coats of Sally Hansen Insta-Dri topcoat. 

So this is a challenge, right? A simple swatch wasn't going to do but I managed to get stuck with what to do next as I usually wear red by itself. I took out some studs and caviar beads I got from eBay a while ago and had been sitting in my drawer for a while. I put on the caviar beads one by one on my ring finger and pressed them down with my fingers to dint the second coat of topcoat. They seemed to hold on quite well for a little while and it was a lot easier than trying to pick them up with a dotting tool and clear polish. I then attached the studs to the rest of my nails with some clear polish. 


As you may have noticed, the polish bubbled up like crazy once it dried. I can imagine this happened because of how thick the coat I applied on the nail was. I'm not sure if i'll keep adding thinner to see if it'll get better or just let it go. I still love this colour. I'm just disappointed that I didn't take better care of this baby! The worst part... This shade is no longer on sale...


Even though Eddie might be unusable now, I'm happy with the design and the fact that I'm trying new things that I wouldn't have otherwise. I was almost going to do a safe-for-me tape mani until I realised that's the next prompt. 

Check out other 33DC entries


Till next time, 

Laura

Tuesday, 24 September 2013

September Tri-Polish Challenge Day 3 AKA Nail Fail

Don't forget to enter our giveaway here!


Day three of the September Tri-Polish is upon us a lot quicker than I realised. For some reason I thought I had a post ready for today but turns out I didn't. I had to come up with a quick and simple mani that would use all three colours. I haven't done a lot of gradients in my polishing life but I knew they were easy enough to me to tackle in no time and the pink I've been using was perfect for stamping. So a stamped gradient it was.

I started with two coats of Essence in Absolutely Blue as a base and let it dry. I then painted three coats of Absolutely Blue and China Glaze in Sweet Hook with a sponge to create the gradient. This is where it started to turn into a fail. The sponge I used was too rough and left little holes on the wet polish, which after three coats of coloured polish and two of Sally Hansen Insta-Dri topcoat, turned into BIG, chunky bubbles. 


I soldiered on and stamped over the gradient with Sally Hansen Insta-Dri in Sonic Bloom, which dried a little too quick on the stamper. Lack of foresight from my part there. :( I redid three of my fingers but they still didn't turn out great. Sealed it all off with two coats of Sally Hansen Insta-Dri. 


Not only are they B-A-D, they are also chunky. All those layers of polish and topcoat aren't making this mani look any better.


I thought of doing a different mani altogether but then remembered I have a life to attend to. Here are other good manis that you can look at after my fail. :)


Till next time, 

Laura

Monday, 23 September 2013

33 Day Challenge: Dots

Here we go with the first day of the Crumpet's Nail Tarts 33 Day Challenge. Looking at all the prompts, they look kinda scary but I'm hoping my creativity stretches enough to create good results for a whole 33 days. Or be prepared to browse Pinterest for lots of inspiration. :)

This first manicure was strongly inspired by this manicure from the Polish Chest. I've been wanting to recreate it for a while but hadn't found the opportunity to do it. Good thing  the first prompt is dots. Woohoo!


I started with one coat of Ulta3 in Black Satin followed by one coat of Sally Hansen Insta-Dri topcoat and then applied a coat of OPI Matte Top Coat. Once it all dried,  I created the silver dots with a larger dotting tool and Ozotic in 509, a silver linear holo which I believe has been discontinued. Of course, I had to bring it out to the sun to show how awesome this polish is.  


Click on the page break for more sunny photos.

Thursday, 19 September 2013

September Tri-Polish Challenge Day 2

Don't forget to enter our giveaway here!

I'm trying to keep this challenge simple so I don't end up frustrated and quit before I even begin. For Day 2 of the September Tri-Polish Challenge I decided to go with some easy chevrons after my base got smudged. Yes, I have a problem with smudging my polish because of impatience and lack quick drying topcoat!!! 

For this attempt, I used two thin coats of China Glaze in Sweet Hook, let it dry and then used striping tape to create the chevrons with Essence in Absolutely Blue. I finished it all off with a coat of Ulta3's Clear polish.


I've noticed that pastel colours can look my hands look a bit lobster-ish in photos and in real life but I'm still loving the softness of mani. 


Hold on. Aren't I supposed to use three colours for this challenge?  Well, I am but the third one is hidden. I've been wanting to do Louboutin nails for a while but my nails never reached a workable length. I know I won't be able to grow them much longer than these as I will be going back to work and when I go back to work, they tend to break. I also figured the pink I was using was close enough to red, right?


They required a bit of preparation, patience and clean up but I love the way they look. I only wish I could have taken better photos but they were so tricky to capture correctly!


So that's my entry for today but don't forget to check others below.


Till next time, 

Laura

Wednesday, 18 September 2013

September Tri-Polish Challenge Day 1

Don't forget to enter our giveaway here!


My attempt at this challenge didn't work out quite as good as I was hoping as it was done in a rush after my first attempt got majorly smudged. I had thought of doing a saran wrap with the blue, pink and lilac colours for the first day of the September Tri-Polish Challenge so I stayed with the idea as it would be quick and easy. 

I used Essence's Absolutely Blue as a base and then added Sally Hansen Insta-Dri in Sonic Bloom and China Glaze in Sweet Hook with some cling wrap. It didn't quite have the oomph! factor I was looking for so I added a coat of OPI's I Juggle... Men. Still didn't look great so as a last resort I added a coat of Ulta3's Stop The Press. 

This is what this mani looks like. The pink looks redder than it is and the lilac is too sheer to stand out against the blue. They kinda remind me of zombie nails with the wrong colours.


This is pre-Stop The Press and it looks plain as anything.


Check out the entries from the other ladies participating in the challenge.


Till next time, 

Laura

Wednesday, 28 August 2013

The Awesome Topcoat: From Almost Trash To This Post

There's a series of events that led me to discover one of the best topcoats I have tried but that unfortunately may not last. Hang on with me for about three minutes and I'll try to keep you entertained.

1. I decided to clean up four old dried up topcoat bottles so I could have them for frankens. I started with Sally Hansen Insta-Dri that had about a quarter of the topcoat and put a similar quantity of acetone. Why I didn't put acetone in all the bottles at the same time is beyond me but I'm glad I didn't and I wasn't trying to be resourceful at this point.

2. A couple of days after, when the topcoat had dissolved in the acetone, I decided not to waste anymore acetone and just added what I had in the Sally Hansen bottle into the essence XXXL Shine Gel-Look topcoat that had dried up to a thick, unusable goop. I left it for a few days before I came back to it.

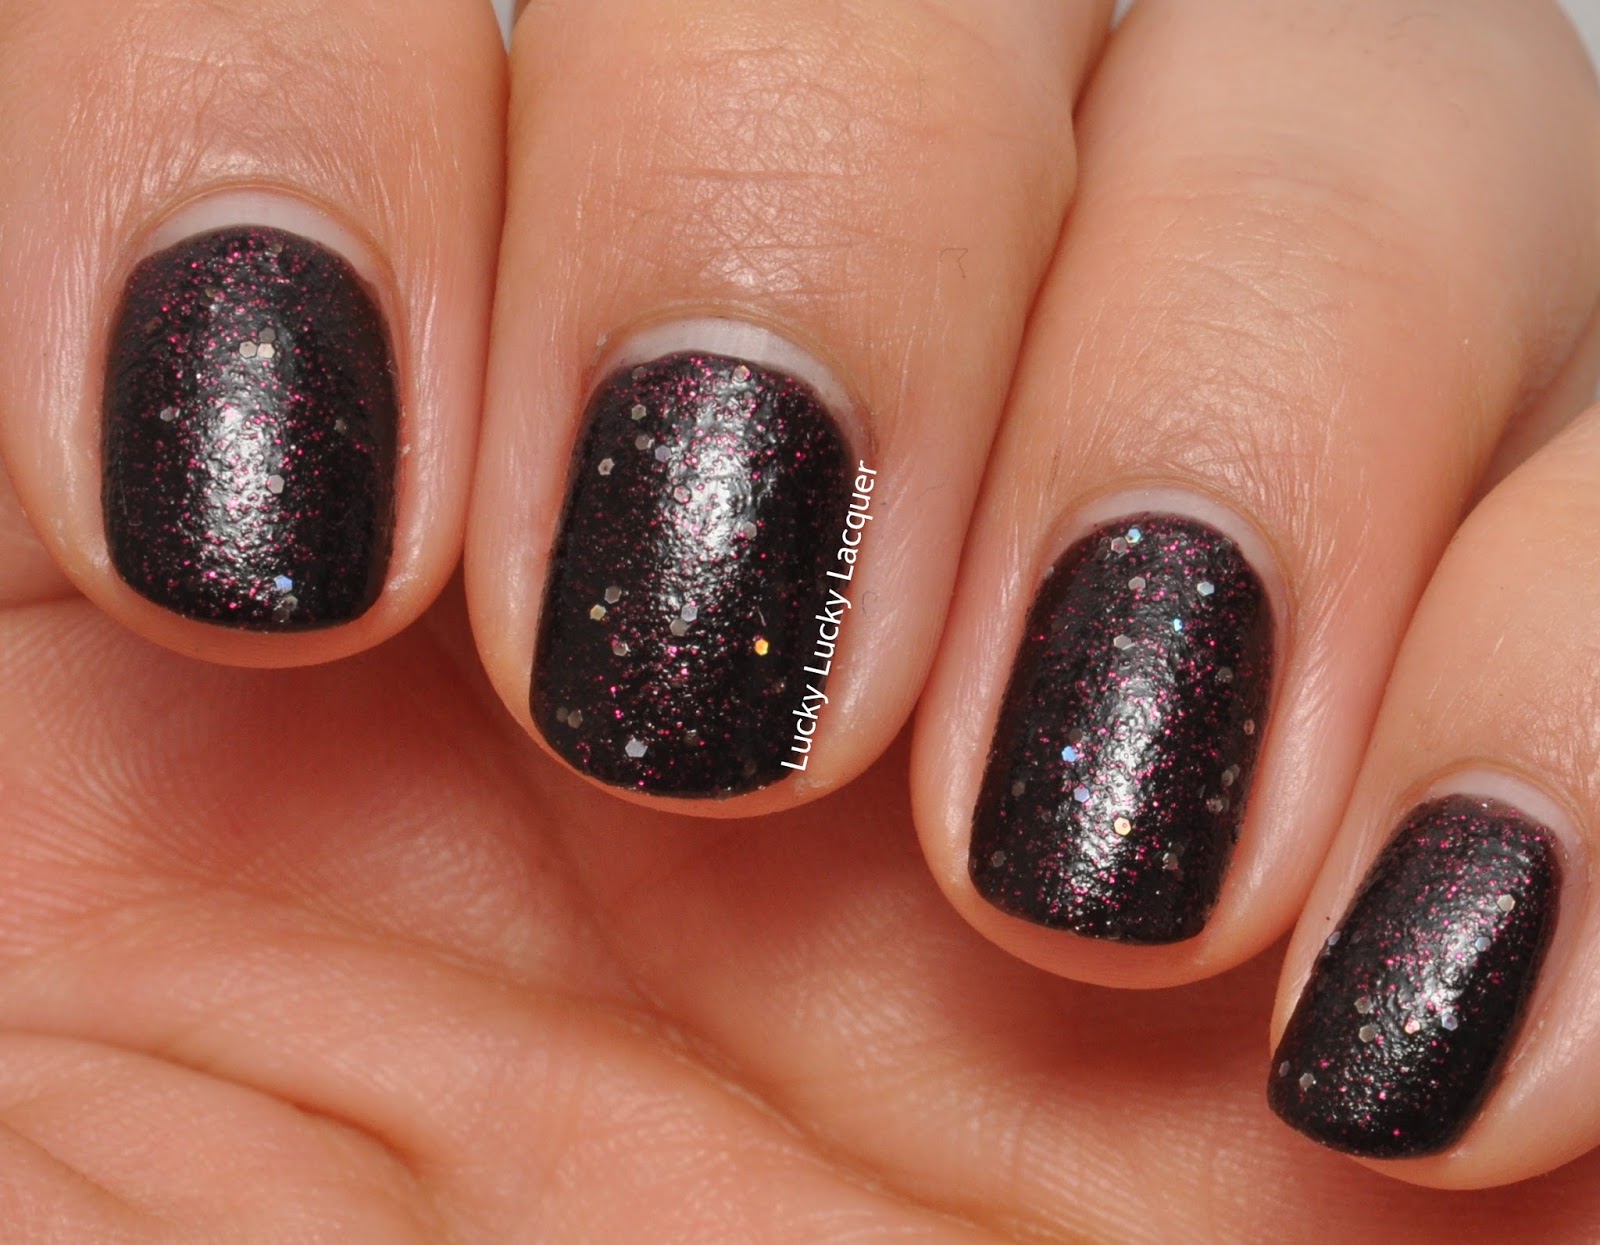
3. In the mean time, I created my first mildly successful franken using Sally Hansen Gem Crush in Lady Luck and Ulta3 in Black Satin in similar quantities. I mixed it up and came back with this. What do you reckon?


Imagine the silver glitter is actually purple, smaller and denser. Does it remind you of any textured polishes?


Wanna have a guess if I show you a close up? I liked the result even though it wasn't that similar so I should call it Stay For Lunch (I hope I'm being funny here!). This little experiment made me realise that I actually don't own any textured polishes even though I've been lusting after them since December. :(


4. I went to Mecca Cosmetica because I felt like splurging a little on some nail strips or polish. Regrettably for me, the prices in there were a little too splurgy for items or polish I knew I could get cheaper somewhere else. I'm talking specifically about The New Black set that has some studs and 15 ml of polish for $42!!! It looks cool, but really $42?, I don't think so. I also saw 6 diamonte nail bows with nail glue for $15.95. I guess I'm a Born Pretty Store kinda gal rather than a Mecca Cosmetica one. :/

5. After my outing, I decided to use my untrieds, group in which my franken was included. I put it on and enjoyed it for a whole two days before I was itching to do something nail art on top of it. 

6. My Seche Vite was running out and only had enough for a couple of manis left, so I had to be frugal with it.

7. I grabbed the essence bottle and noticed the liquid inside had a similar consistency to a normal topcoat. I tried it on top of Stay for Lunch (have I got you hooked?) and to my surprise it made it smooth and shiny with just one coat and it dried to the touch within the minute. Had I just franked a topcoat too?!  


If you ever used this Essence topcoat you'd know it was a life saviour for topcoat-hungry glitters and it would have a squishy texture when dry but it would take hours and hours and h-o-u-r-s for that to happen. Sally Hansen Insta-Dri dried super quick and prevented chips for a few days but it took a few coats to even out glitter or nail art. Had the best properties of both topcoats came to life when I mixed them up? So far, it looks life it! I've tried it on a few other polishes and it still works fine. My only concern is that the acetone may change the topcoat for the worse in the long run and this topcoat won't be usable anymore. 

So the moral of the moral of the story is I created an comparable-to-Seche-VIte topcoat with a third of dried up Sally Hansen Insta-Dri, a third of goopy essence XXXL Shine Gel-Look topcoat and a third of acetone, roughly. I was just going dispose of the liquid (safely, of course!) if I hadn't tried it. Plus, all those events I mentioned above finally led me to this stamping mani. I know that's not the point of this post and it's not my best work but would you look at how shiny and smooth it is with and extra coat of The Awesome Topcoat. 


This top coat is sooooo squishy but it doesn't leave dent marks like other topcoats and it doesn't make the polish peel off because of the thickness (Looking at you Seche Vite...). Please excuse the dodgy stamping job.


I hoped you stuck around for the three minutes and that I didn't bore you to tears. :)

Have you ever tried mixing topcoats into a same bottle? Any favourable results? Or bad ones? Would I have any luck with the longevity for The Awesome Topcoat? Are you sick of the word topcoat yet?  I almost am. 

Till next time, 

Laura 

Wednesday, 10 July 2013

Valentino Inspired Manicure

I love (virtually) rummaging through the online New York Mag fashion sections for inspiration for manicures. Think all those designer collections that appear on Vogue and Elle but at your, er..., fingertips for free. Today, I've got a manicure loosely based on the one of Valentino's Couture Collection dresses for the 2013 Fall.

Photo 32 from Valentino

I look at the details, colours and textures to see how they can be translated to the nails without being too literal. When I came across the above dress I knew I wanted on my fingertips!!!

I must warn you, the details of the nail art wasn't great but I liked how it all looked together and that's the main reason I'm putting the photos up. I know it's not perfect but this blog is also part of the journey towards amazing manicures... Deep, aren't I? Haha!

I started with four coats of Sally Hansen Insta-Dri in Peatal Pusher for the nude base then stamped the pattern only half way up the nails with Bundle Monster's BM-201 plate using Konad Special Black polish. I sealed it with a coat of Seche Vite to make sure the stamping wouldn't come off when I placed the stickers for the half moons. I don't actually know if that would happen but I wanted to be safe rather than sorry. 


Once the Seche Vite was dry I put on half of a round sticker in each finger and striping tape on the tips as french manicure guides. I carefully painted  Ulta3 Black Satin on and removed the tape and stickers as soon as I was done with each finger. Finished it all off with one last coat of Seche Vite.


There was a lot of smudging, crooked half moons, bad and excessive clean up, major shrinkage on my pointer and the french tip lines weren't as crisp as I had hoped.


The photos weren't turning out either and each of these photos were taken at different times because I just couldn't take a good one. I could keep going about how this was a bad experiment but one thing I managed to accomplish was to get out my comfort zone and think how I could create a mani from a dress. I think this is one of the most creative things I've come up with and that makes me a tiny little bit proud. I would  usually shy away anything that involves creating arty things.

What do you guys think? Do you have sources of inspiration?  I hope you guys enjoyed the mani.

Till next time,

Laura 


Thursday, 4 July 2013

The Challenge Entry That Wasn't

I always wondered how nail bloggers got involved in 31 day challenges. Does one just find a challenge and starts doing it? Would one have to get an invitation to participate? Was there some sort of exclusive club I didn't know about that created all these challenges I saw floating around? I still don't know the answer to these questions but I was really happy when I came across the Oh Mon Dieu! It's The Rather Awesome 31 Day Challenge Giveaway!. As you may infer by the name, this is a challenge open internationally in which you can win prizes for completing each challenge and get up to 31 entries for the month, when completed. I came across it by the second day of the challenge and funnily enough, I had completed the first two entries unknowingly and figured I could jump on the 3rd day without too much trouble.

Excitedly, I thought of all the possible nail art I could create with the prompt Purple. One of my all-time favourite polishes is actually a purple by B Collection by Bloom called Dubai (no longer on sale) but a simple swatch wasn't going to do, so I created curved, black and gold french tips to spice it up.

Version 1: Two coats of B Collection by Bloom in Dubai on a base-coated nail followed by a coat of Seche Vite. Once dry, I painted Sally Hansen Insta-Dri in Night Flight with the polish brush, let it dry, then applied OPI's Goldeneye for the gold and used one last coat of Seche Vite to smooth it all out.


I had a lot of BAD drag marks from using Seche Vite to dry the first two coats on all my fingers. I did it late last night and I didn't really noticed the marks until after I had taken the photos. By the time I was done editing the OK photos, I was too tired to fix them or do them again. Hence, version 2 was created this morning. Same steps as version 1 but iIapplied Dubai carefully and skipped the first coat of Seche Vite.  


I was really happy with the way it came out, even if all the tips had a different curvature/centre from each  other. Especially keen on the middle finger.


My camera was freaking out a little from all the shine on the nail and I couldn't really show a lot of crisp detail. So what would I do in these sort of situations? Bring out the matte top coat.  Doesn't that look cool?


I got some cotton fluff stuck on my ring finger, had to fish it out with tweezers, tried to smooth it out with matte top coat and hoped that it wouldn't be too noticeable.  


So we all love Goldeneye, right? When I was taking the photos for version two, I noticed there was a lot of green reflecting from this polish. I was wearing a green cardigan at the time so I took it off to make sure it wasn't that colour reflecting. In a much closer, the Goldeneye over black seemed to bring out a green tinge on what seemed to be translucent flakies. Night Flight is a green based black so that might explain the green. I wonder how Goldeneye would layer over other colours but that may be another post altogether.


I was really happy with the way this turned out and this curved french mani and colour combination are things I wouldn't have tried had it not been for the challenge. 


So why the challenge entry that wasn't? Well, when I checked out the prize pack that corresponded to Australia, I was a bit disheartened as there was nothing in it I didn't already own. This is not a critique on the prizes but it wasn't an incentive for me to enter the competition. The challenge bit was exciting but I know I won't be able to complete since I go back to uni in two-ish weeks. Maybe I'll start my own challenge... I'll like to see how that goes.

Have you been part of a challenge? Did you enjoy it? Any that you would recommend?

Till next time, 

Laura

Monday, 22 April 2013

Sideways Ruffian

Here I was again itching to paint my nails after spending the whole weekend without nail polish on. That was almost 72 hrs!!! How did I survive? I had to think of something simple and choose fast drying polish, since I'm lacking quick-drying topcoat and I want to go to bed.

This is where Sally Hansen Insta-Dri Night Flight and Sonic Bloom came out to play. This mani took me about ten minutes from using basecoat to the taking photos. I started with a PVC basecoat, then applied one coat of Sonic Bloom, let it dry and applied one coat of Night Flight using its flat brush to create the sideways ruffian. Finished it all off with a high shine topcoat and voila! Extra quick mani.


I picked up these two bottles from Kmart on clearance for $4 each a little while ago. Every so often, Kmart discounts the Insta-Dri polishes, even though they remain in the core line in every other shop. I find it a bit strange but I've taken advantage of it a few times. I won't stop buying them as I can't wrong their creamy formula, super quick drying time and one coat application.

I found these polishes to be a perfect way to try the ruffian trend that's been around for ages. I wasn't originally planning on creating this but as I applied the black polish to my middle finger, I decided halfway through the stroke I wanted a sideways ruffian. I don't think it turned out too bad but I'll let you guys be the judges of that.

What do you think? Would you consider this nail art or is it too simple?

Till next time, 

Laura

Tuesday, 16 April 2013

CoverGirl's Midnight Magic

In the last post I showed you guys Cover Girl's Wine Stain, which was absolutely amazing. At the same time, I purchased Midnight Magic by the same brand and of course, I had to show you.

This polish seems to be a gunmetal silver jelly with tiny iridescent flakies and multicoloured glitter. I say it seems because the base can change from a lighter grey to a oil-slick black to almost a mossy green, depending on what light is being reflected. 

Swatches were done with two coats and no topcoat.This formula was great. There were no flooded cuticles, no gloopiness or thickness and it dried quickly and super smooth, which can be unusual for glitters. It was just perfect. Another big tick for the new range of CoverGirl's polishes.

With low flash

With strong flash
I would love to show you what this polish looks like in the sun but as I started writing this, a massive storm popped out of nowhere, taking the sun away with it. Instead, I'll show you the accent I created with striping tape and Sally Hansen Insta-Dri Night Flight. Finished the mani by top coating only the ring finger to smooth the black polish out.


So original, right? I still love the way it looks. I hope you guys like it too.

I'll have to update you with bottle photos as it's looking kinda dull without that sun. Watch this space.

Till next time, 

Laura

LinkWithin

Related Posts Plugin for WordPress, Blogger...