Showing posts with label Gradient. Show all posts

Monday, 2 December 2013

33 Day Challenge: 3 Favourite Polishes

It's the third last day of the 33 Day Challenge and I'm gonna make this super quick because I am tired but didn't want to miss another prompt from this challenge that is about to finish. Here we go...

Narrowing down the stash to bring out my three favourite polishes wasn't an easy task, they are all so pretty and each has its own qualities. I decided on the ones that were my first favourites of a certain type and that I still love. I started with a coat of Essence's Snow White (my first and only jelly), let it dry and stamped Essie's Penny Talk (my first one coater metallic that has been featured in this blog plenty of times) using the plate BM-417 and then created a french tip gradient with Snow White and B Collection by Bloom in Dubai (the first polish that lasted about 10 days on me with top coat and had an awesome formula, no longer on sale but I have three bottles of it :) ). Topped it all off with one coat of Seche Vite to smooth out the gradient. 


These nails were super hard to photograph because of how shiny they were and my camera was freaking out when I was trying to take photos in the sunlight. I brought the nails into the light box but the shine was still too much and I couldn't figure out what settings would work. 


Anyway, this is what I came up with and I'm in love with this stamped jelly sandwich. It's shiny, the colours work well and I came to realise I hadn't done something similar before.


Quick note, this is how the jelly sandwich looked like in the sun. Yep, I cropped the only half decent photo I took but it shows some of the pretty light that was reflected from my nails.


Don't forget to check out the other particpants' manis for today's prompt.


Thursday, 31 October 2013

33 Day Challenge: Artwork With Favourite Brand

Like most lacqueristas, I cannot pick a favourite brand. They all have their qualities and that's why we have them in our stash, right? However, when I quantified the qualities of some of my polishes, I decided Topshop came out a winner. Their polishes last forever on my digits, they hardly chip, they are reasonable priced for Australia and they tend to keep up with polish trends, sometimes even invent their own to-drool-for colours. I think the main reason why I chose this brand is because Topshop polishes mean a holiday for me. There is no Topshop in my city so every time I get a bottle is because I'm somewhere away from home; as I have gotten them in small batches, each one has a special time an d memory attached to it. 

 
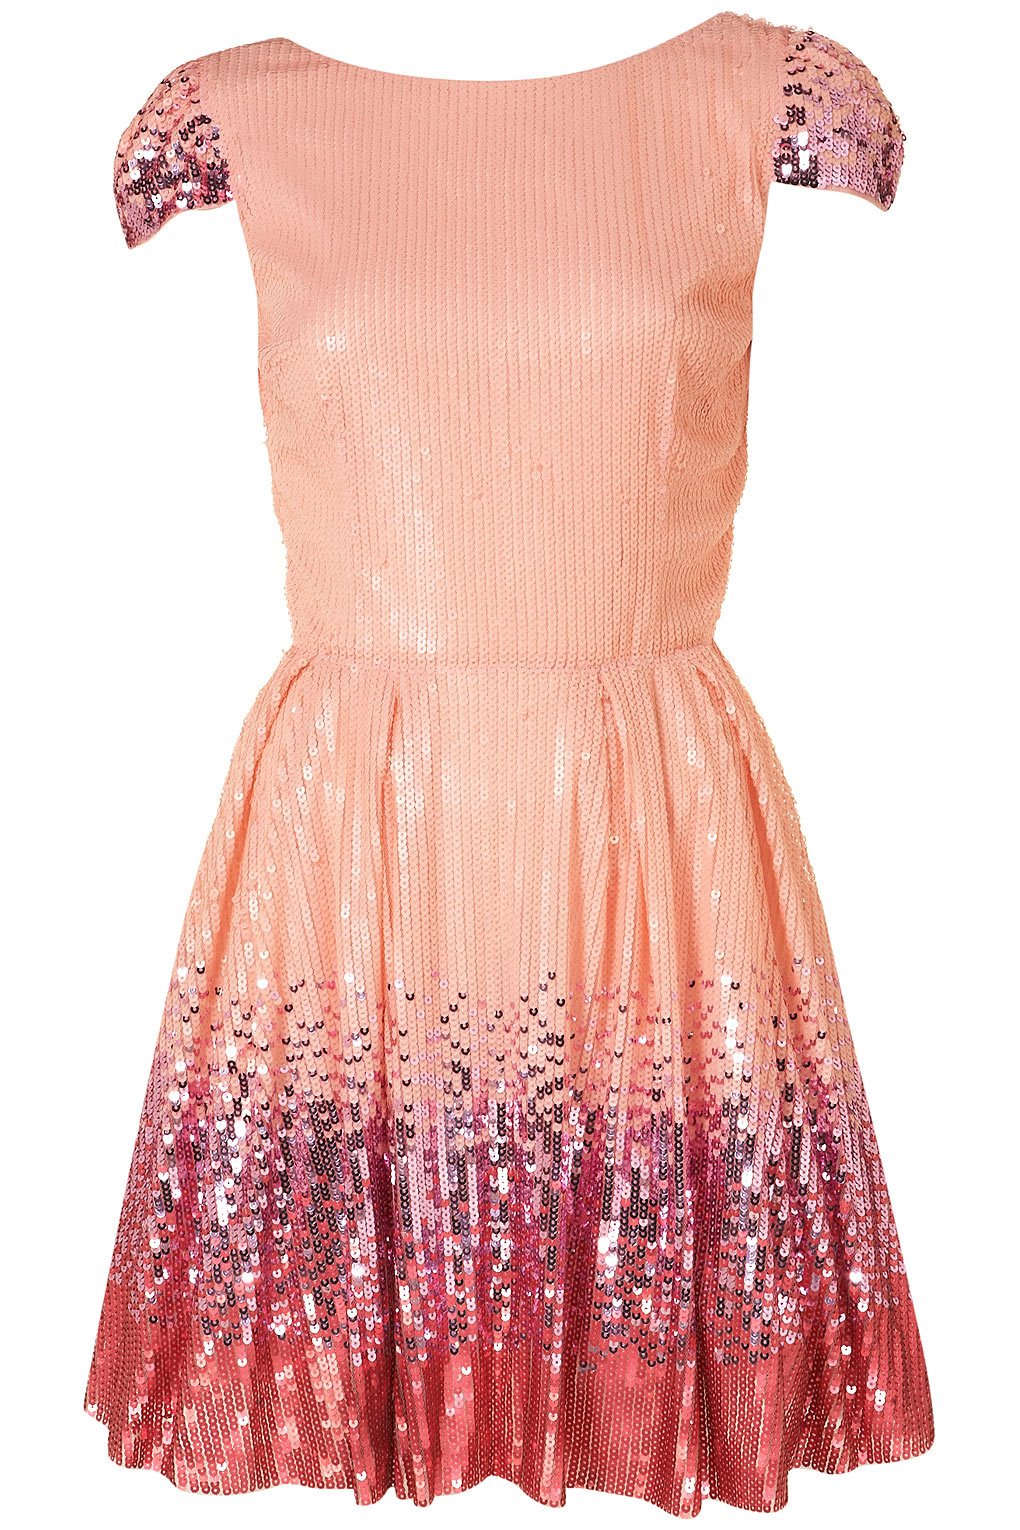
I am aware I'm a day late for today's challenge but c'mon, I prioritised my uni work over nails for once. I had to come up with something quick and settled to loosely base my mani on this dress from Topshop, just to keep going with the theme. I figured dressmaking and designing is art, right? So I'm still responding to the prompt for the challenge.


Source
I used High Voltage (pink creme) as a base, then put Plume (glass flecked purple) and Blitz (gold shimmery pink) on a sponge to create the gradient and slowly tapped it on my finger. I repeated the sponge on process three times on each finger. Sealed the gradient with one coat of Seche Vite.


As soon I was ready to take the photos, the sun hid behind some clouds. This gradient is ssssparkly so I waited about 15 minutes in my backyard waving my arms around telling the clouds to go away. I wish this was a joke but I actually did it *Laura looks away slightly embarrassed*. The sun came out for about two minutes so I had to take photos quickly. 


I was concentrating on getting the sparkle to show and not so much on the colour accuracy. The next photo is not flattering but it shoes a much better representation of the  light spectrum reflected from my nails.


I actually did the gradient on my thumb first to see how many coats Plume would need as it can take four coats of the polish on the nails to look opaque. I was quite happy with the way it turned out because generally my gradients turn out super thick and uneven; I guess using the sheerer polishes helped me out.


I really like this mani and I wanna keep it for a long time, it's so pretty and sparkly. I know I didn't show it very well on the photos but take my word for it. It also reminds me of the half moon/french tip trend that was happening at the beginning of the year and it was completely unintentional.


Random photo that I took when I was waiting for the sun to come out. Anyone know what flower this is?


Check out the other 33DC participants' manis. 


Till next time,

Laura

Tuesday, 24 September 2013

September Tri-Polish Challenge Day 3 AKA Nail Fail

Don't forget to enter our giveaway here!


Day three of the September Tri-Polish is upon us a lot quicker than I realised. For some reason I thought I had a post ready for today but turns out I didn't. I had to come up with a quick and simple mani that would use all three colours. I haven't done a lot of gradients in my polishing life but I knew they were easy enough to me to tackle in no time and the pink I've been using was perfect for stamping. So a stamped gradient it was.

I started with two coats of Essence in Absolutely Blue as a base and let it dry. I then painted three coats of Absolutely Blue and China Glaze in Sweet Hook with a sponge to create the gradient. This is where it started to turn into a fail. The sponge I used was too rough and left little holes on the wet polish, which after three coats of coloured polish and two of Sally Hansen Insta-Dri topcoat, turned into BIG, chunky bubbles. 


I soldiered on and stamped over the gradient with Sally Hansen Insta-Dri in Sonic Bloom, which dried a little too quick on the stamper. Lack of foresight from my part there. :( I redid three of my fingers but they still didn't turn out great. Sealed it all off with two coats of Sally Hansen Insta-Dri. 


Not only are they B-A-D, they are also chunky. All those layers of polish and topcoat aren't making this mani look any better.


I thought of doing a different mani altogether but then remembered I have a life to attend to. Here are other good manis that you can look at after my fail. :)


Till next time, 

Laura

Friday, 6 September 2013

Pastel Stud Wheel by Born Pretty Store

I'd consider myself a fan of Born Pretty Store but I haven't gone past ordering the basic gold studs and glequins from them even though they have a MASSIVE range of nail art supplies and they are so cheap. A month ago, I placed an order for a heap of different rhinestones, a textured polish and colorful studs, all which I believe are recent additions to the website.

Today, I wanna show you the Pastel Stud Wheel, which actually has a much longer name here, that I have fallen in love with. I can be indecisive when it comes to handing over my cash for products, i.e. shopping, and I have to make sure I'm getting the best deal. I was particularly happy with this wheel because it has two shapes in six different colours each for US$7.59. If I was to buy a one colour and one shape I'd have paid  US$2.99 on special (US$4.99 otherwise), but there would be no variety and I wasn't guaranteed to like them. 

I'm loving this idea of doing skittle manicures to show more colors and it almost makes me feel like I have created nail art :) . Here's my latest.


The accent nail was supposed to be covered in the pastel studs but I started to get slightly frustrated so I kept it simple.


I start to believe photo spamming is the way to go for this blog, so please click on the page break for more photos and materials used. :)

Thursday, 25 July 2013

Gradient Glitter Sandwich Accent

I didn't really want to put another pink post up but I have to tell you this is my third attempt at nail art today and I was getting a little frustrated. I grabbed the closest one coater and went from there as I really wanted to post something today. 

I started with Leighton Denny, a UK brand, in SO L.A. and applied one medium coat and left it without top coat as it was shiny enough without it. For the accent, I dabbed a coat of Sportgirl's Nail It! in Atlantis and created a gradient with OPI's Yodel Me on My Cell and An Affair In Red Square. I only sealed the accent with Seche Vite.


The gradient was quite sheer but it let the glitter colours pop a little more than expected.


I know, I know. The gradient wasn't great and the glitter coat created a lump on the side  of my nail. Like most of my nail art, it looks better from afar. :)


In my last post I mentioned the colour of What'Up could be very easy to find and I think I may just have prove the point.


To my defence, So L.A. came in a 8 bottle pack where I couldn't choose the colours. So What'Up is still totally justified. 

Source

I'll leave you with that. I promise I'll have something better in the next post.

Till next time, 

Laura

LinkWithin

Related Posts Plugin for WordPress, Blogger...