Showing posts with label Born Pretty Store. Show all posts

Thursday, 7 November 2013

Born Pretty Store Rhinestone Bows Review

I've been absent for about a week due to a heap of stuff and missed two 33 Day Challenge prompts. I know a lot of bloggers apologise for absences and explain what's happened but mine is so mostly due to uni (read life) so I don't think it's overly necessary. This blog is supposed to be fun and pressuring myself to post when I just don't have time or inspiration, takes that fun away and it just becomes a burden. Last night, I tried to catch up with the challenge but I just couldn't come up with anything worth posting. I decided to call it a night and thought I would be better off doing this week's prompts next week when I will have a lot more time.

However, I still wanted to post an idea I've had in my head for a while which meant the brainstorming part was done and I just had to get my hands moving... quickly. I received these rhinestone bows in #1 from Born Pretty Store a couple of weeks ago and goodness, they are pretty. Over a centimetre big but pretty.


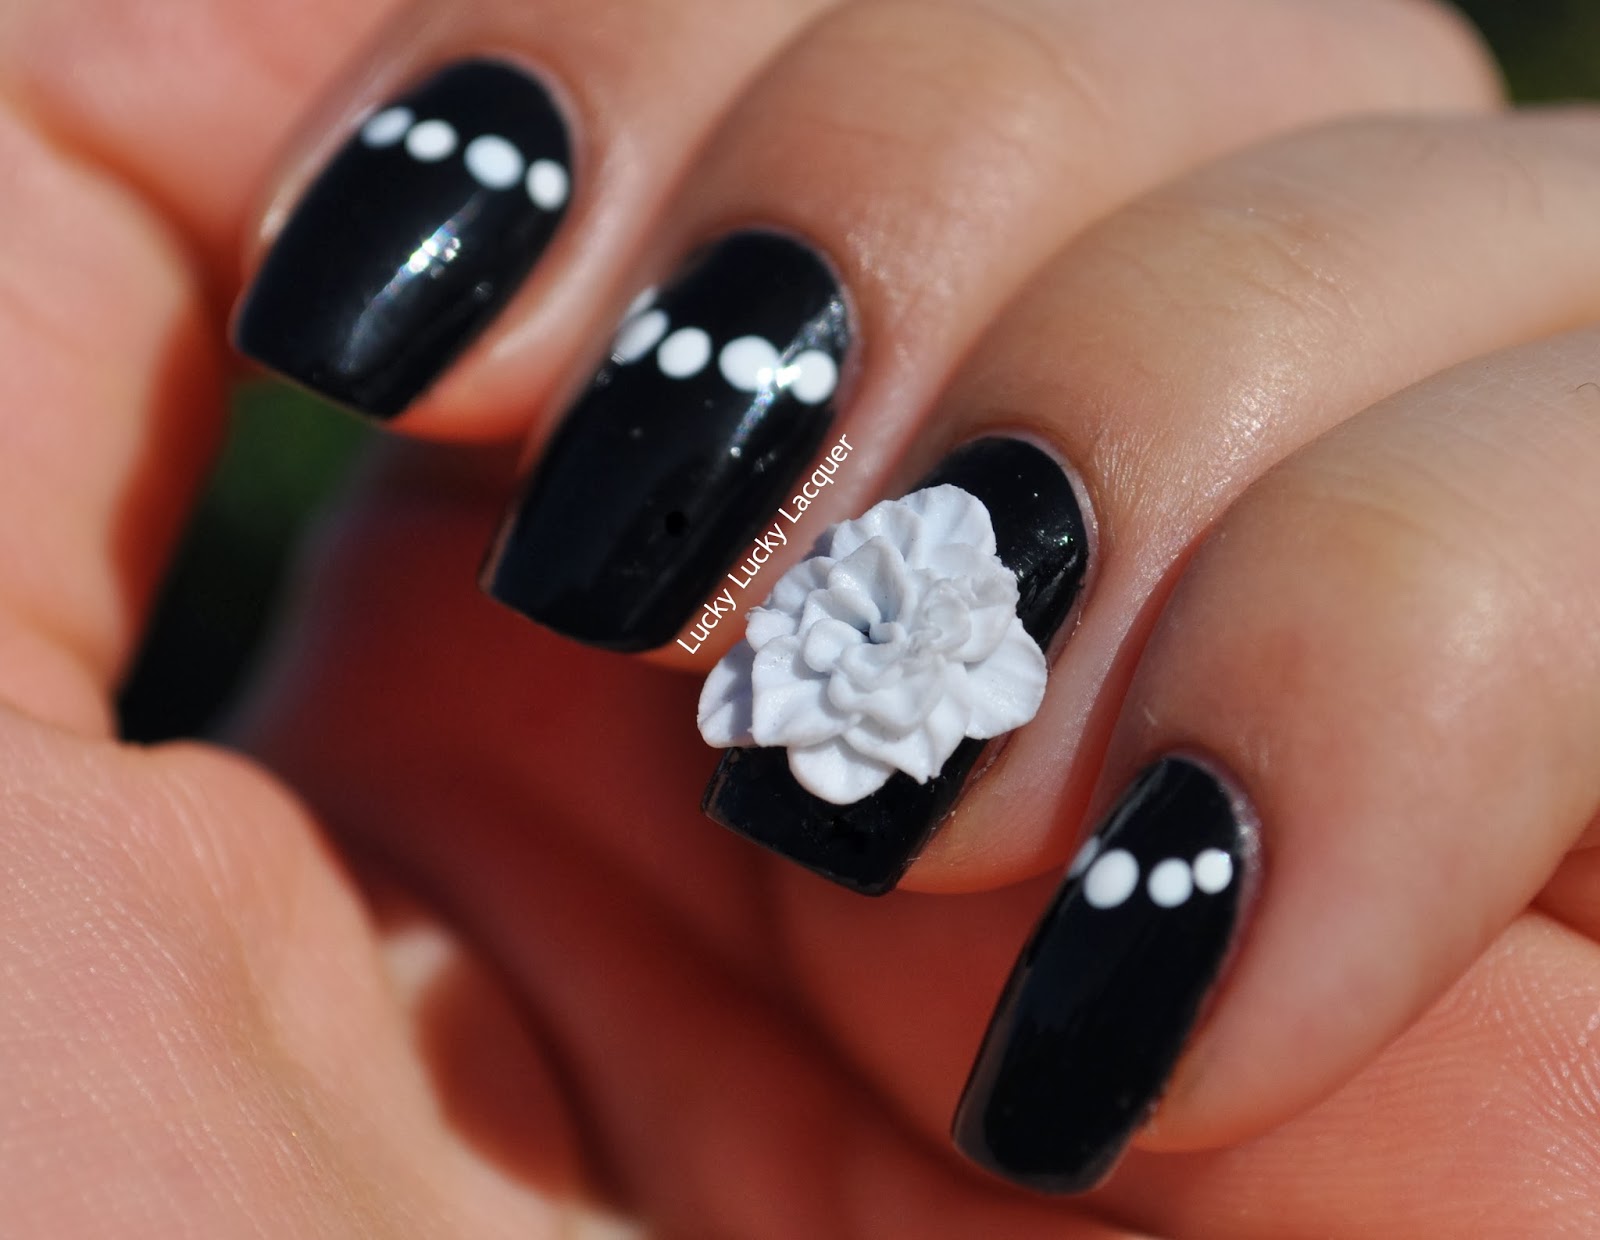
I used two coats of Mimco's Jade as a base, applied one coat of Seche Vite to cut drying time, taped all my nails but the ring finger once the SV had dried to create the straight corners with two coats of OPI's Goldeneye. I applied another coat of Seche Vite on all my fingers to even out the polishes (and I got bubbles, arrrrgh!!!). I finally attached the beautiful filigree alloy bow with a drop of Seche Vite and voila! This mani was created.


These bows are big and heavier than your average nail art supply so I should have used some nail glue to attach it but I don't have any on my hands right now. I've ordered some online in anticipation of this mani but it's taken a little longer to arrive than expected. Make do with this one.

Attachment issues aside, I'm loving this mani. I sometimes can be timid when it comes to my manis and tend to keep them  on the conservative side of things. The packet of bows came with 10 units, enough to put one every finger but I figured that would be too much bling for one mani. I was about to keep it simple by just using one bow on plain teal nails but then realised it was too boring. I figured the gold would bring it all together and make the mani a little bolder. That's what I think anyway and let's face it, if I can't say what I think in my blog, where can I?

Back to nails, I brought the nails out to the sun to see how shiny they would show up but the sun was too low to get some amazing pictures, I just got good pics. ;)


I would use this mani for a special occasion and instead of a ring. I have a lot of very big rings that I use on my ring or index fingers so it'd still look similar but closer to my fingertips o_0 . It was still a bit strange having such a big piece of nail jewelry on my fingers and I kept bumping it against random things. I think that's another reason why the bow only lasted about 10 minutes on my fingers. 


*EDIT* I forgot these bows are slightly curved, which means they have more surface to attach to the nail and a more comfortable wear. *EDIT*


3D Nail Art Sticker Colorful Bling Rhinestone Bowknot Nail Decoration - 10pcs

These bows retail for $5.99 for a pack of 10 and there are 8 different designs available. You can use the code LUCKYG10 to get an extra 10% off your purchase from Born Pretty Store.


I'm gonna sit by my letterbox and wait for my nail glue to arrive so I can wear this for longer than 10 minutes. Hold on, I have an exam tomorrow. I better get on to that first...

Till next time, 

Laura

Disclosure: 
Affilliate Link. 
Bow studs were sent by Born Pretty Store for honest review. 
All other products featured were purchased by me.

Friday, 25 October 2013

BPS Fox Studs Reviews AKA 33 Day Challenge: Animals

I'm killing two birds with this post mostly because the timing of my latest Born Pretty Store delivery could not have been better. I may have also singularised today's prompt of the 33 Day Challenge from animals to animal... Not a big deal, right?

A few weeks ago, I asked to review these beautiful fox studs from Born Pretty Store and I knew I had to use them for this post. I was eagerly hoping they would arrived before today and they did. Phew!!! I found it a bit challenging to think of what to do with these apart from just sticking them to my coloured nail polish. I ended up coming up with this mani that I would like to call 'Night Fox' (it's fun naming manis...). 


This studs are absolutely beautiful, just look at them. They're these dainty little detailed studs, 6mm to be precise, and because they're a sort of abstract fox face there's so much you can do with them. Another wonder about this is that they don't sit flat on the nail as they are so slightly bent so there's no snagging on clothes, hair, fluff, etc.


I think they are made of an alloy metal that is used for most studs as these are really sturdy but light. There are only five in the pack, not quite enough for a whole mani, but they are great for accent fingers. Looking at the photo above, I just realised one of the studs has silver ears compared to the white ears of the others. Hey, that's more variety for me from one pack!


I stuck the stud with clear polish but I'm pretty sure nail glue would have been better. It didn't stick very well with my method and it fell off after a few hours. They can be reused so it really depends whether you are planning to reuse them or not to choose your adhesive. 


Now for the polishes used in the mani, I started with two coats of Ulta3 in Black Satin, followed by one coat of Max Factor Nailfinity in Extra Frost, which gives the black that lovely night sky look without too much effort, and sealed the base with two coats of Seche Vite. I painted the grass with a green stripper before using Layla in Metal Chrome to stamp the moon and free hand the what-I-thought-looked-like stars. I dotted the paws and tail with the same polish before I finished the mani off by creating the tip of the fox tail with a white stripper. I decided not to topcoat the mani because I wanted to keep the texture on the grass and the fox tail. Oh yeah, I stuck the stud with some clear polish right at the end.


You can get the studs by clicking here for US$3.48. Don't forget to use our code to LUCKYG10 to get 10% off full priced products of Born Pretty Store site.


I'm pretty happy with the way the mani came out and I was surprised that the free-handing that I did was fairly quick. All that behind the scenes practice might be paying off. Check out the other talented ladies' manicures for today. 


Disclosure: 
Affilliate Link. 
Fox studs were sent by Born Pretty Store for honest review. 
All other products featured were purchased by me.

Tuesday, 15 October 2013

33 Day Challenge: Flowers

I'm sooooo late for a lot of things in this blog! I'm gonna try to tackle a few on one post see how I go. I must say the last three weeks of uni have taken over my life!!! Rant over. Back to the blog...

First, my 100th Post Giveaway has ended, a week ago to be exact, *looks down to the ground in shame* and both winners replied within a few hours of emailing them. Congratulations to Kirsten on getting a $30 Ninja polish voucher and to Roshwill for being the winner of the $30 Born Pretty Store voucher! Thanks to everyone for sticking around after the giveaway finished. I've seen followers disappearing after giveaways are done on other blogs so I was really glad the number of people that are still willing to see my nails has still pretty much stayed the same *warm and fuzzy feelings to everyone*.

Now to the challenge. I'm late by one day in Australian Eastern Time but the plus of being on this side of the world is that there are still 22 hours on Tuesday before Monday is finished somewhere in the world. Mwahaha! Technically, I'm still on time.

I opted for a quick manicure due my lack of time so I looked through my nail art supply stash saw these silicone flowers that I got from Born Pretty Store a few weeks ago. As most of my posts at the moment relate to the challenge, I thought today would be a good day to take them out for a play. Looking at the white flower, I realised I had never done a white and black manicure. In this blog or ever. So here it is, my first black and white mani. 


I know, I know. Black and white is not the theme of the challenge but a white flower on a black base sort of is. I started with one coat of Ulta3 in Black Satin on all my fingers and used Sally Hansen Xtreme Wear in White On to dot some half moons. On the ring finger, once Black Satin had dried, I applied a coat of nail foil glue and let it dry. Once it became clear, I stuck the silicone flower. 


I had originally tried clear polish to stick it on but it fell off after I washed my hands, completely random, right?  I tried washing my hands after I applied the glue and the flower hasn't come off. Shouldn't glue wash off and not polish? I'm not sure what happened there but I'm sticking to the glue for now on. 


The silicone flower was really easy to work with and its flexibility is really great for not snagging it on everything. If you've ever worn large flat 3D nail, err..., items (is there another word?) you would know what I'm talking about. Did I mention they are super detailed. Check this out.


Another plus, they can be reused. This is what it looked like after I carefully peeled it off the nail glue. 


Born Pretty Store is having a 20% off everything sale for two days, 15th and 16th Oct,  and the flowers are currently retailing at $1.99. If you haven't found a discount code for BPS, you can use LUCKYG10 to get 10% off.


These type of mani is not something I would wear everyday, even though I'm very much in love with it. The flower is very out there and big but that's the fun part of it. I would wear this instead of a ring on a night out... I f I had time to go out.

Check out the other timely ladies that have participated in today's (yesterday's?) challenge. 


Tuesday, 8 October 2013

Born Pretty Store Leaf Shaped Studs

I've been building up a healthy collection of studs lately so when the opportunity arose, I put my hand right up and asked to review these leaf shaped studs from Born Pretty Store. I loved the variety of neon and pastel colours and they seemed versatile enough to create lots of designs. Best bit? They come in a wheel. I'm terrible at spilling studs all over the place when they are in bags. Does that happen to anyone else? No? OK. Either way I'm so very glad they came in this handy little package. 

When I got the my hands on the little wheel, the only design I could think of was flowers. It seemed like an obvious choice so I put some more thought into it and it felt like I had a light bulb moment. Rainbows? There wasn't enough room. Fireworks! It would be awesome to recreate fireworks and I could still use rainbow colurs. Here's my take. Please note that these pictures are colour inaccurate but you get an idea of what can be done with these studs.  


I started with one coat of Models Prefer in Hickory Dickory, a dusty blackened out navy blue, and topped my index finger, thumb and pinky with a coat of Seche Vite. To prevent any smudging/bumping/having-to-redo-any-nails, I waited for the topcoat to dry completely and proceeded to apply Ulta3 Clear on my middle finger. I got myself sticking studs from the bottom in a fan out design without waiting for the clear polish to dry. I picked Ulta3's Clear polish because I thought it would be a slower-than-topcoat drying polish but it dried before I was done with one nail and each nail only took me a little over a minute. I've had topcoats that dried slower than that but I have run out so I just kept adding fresh thin coats of Clear until I was done with the nail. I mirrored the design on my ring finger to simulate the fireworks on a dark night.


Stock image of 'Multi-coloured light sphere on a black background'
Source
Looks the same, yeah? Actually it reminds me of this... Sort of.


Tie Dye Spiral Bandana
Source
I knew that if I didn't topcoat the studs, they would end up falling out within the hour and I really liked the look, so I applied one thick coat of Seche Vite on my ring and middle fingers. This is where the mani went pear shaped. A lot of bubbles started forming around the studs and there was nothing I could do about it!!! I just had to watch it fail...


I went out to the sun to take photos because natural light is very forgiving on those little details. Do me a favor, squint your eyes while looking at the following pic. Doesn't that look good? :)


I still wanted to get a colour accurate picture so I went back to the light box. It still isn't showing the exact colours but it's better.


These studs should glow under black light but I don't have the equipment to test it out. I might have to invest on one. 


Putting the topcoat bubbling fiasco aside, I'm really happy with these manicure and the studs. They are sturdy, the colour doesn't bleed, they are small enough to fit a heap on your nails but big enough to not be fiddly and you get 300 pieces per wheel. I had a tiny bit of tip wear on one of the orange studs on my middle finger after about 12 hours, I'm not sure if it was my application or the quality of the studs. I haven't had any issues with the rest of the studs. The wheel is discounted at the moment for $5.59 here (or you can click on the photo below). 

300pcs 2*4mm Leaf Shape Fluorescent Candy Colors Stud Rhinestones Nail Art Decoration w/box


If you are placing an order and haven't found one in any of the other million blogs that have a BPS store coupon code, feel free to use ours to receive 10% off full priced items.


Till next time, 

Laura


Disclosure: 
Affilliate Link. 
Studs were sent by Born Pretty Store for honest review. 
All other products featured were purchased by me.

Friday, 13 September 2013

Born Pretty Store Special Texture Polish in #10

Have you ever thought you had bought a particular product only to find out you actually ordered something else? A few weeks ago, I thought I ordered a textured polish from Born Pretty Store that looked similar to OPI's Stay the Night but when I got my package I got this muddy looking polish. I was outraged!!! How could they mix up my colours?!!! When I checked what I had actually paid for, I realised the fault was mine because I ordered a different colour... So I had to make do and try it on.

Born Pretty Store has come out with a line of 12 different coloured textured polishes, which are numbered instead of named, and contain 15 ml for $3.99 on special or $5.59 otherwise. You can find them here.  The one I got is #10, a goldy, olive shimmer base with dark, almost black, texture particles (you can tell I'm really trying here). This is one coat over PVA base.


The formula for this polish was very thick and when I say thick, it was almost gloopy. The polish hung on to the brush like grim death until I took some off by swiping the brush on side of the bottle. Funnily enough, when it came to applying it on the nail, the formula worked great, the polish stayed where I put it and it was opaque in one coat. It was still thick when wet but once it dried, which didn't take long at all, it looked fine and the texture really come out. The wear was OK, it chipped within two days but for someone that changes her polish almost daily, it wasn't a problem.


I've seen mixed reviews about these polishes but from this experience I can tell you they are worth every cent. I'm sure this will get thicker as time goes by but I'm pretty sure a little thinner can solve that issue. 


Just a quick note about clean-up. Even though the formula spread well, I may have painted my ring finger cuticle and when it came down to trying to remove it with acetone, it was a little difficult. Hence the uneven line on that nail.


If it wasn't for the colour, which doesn't suit my skin in the slightest by making look extra yellow, I would raving about this polish. However, there are other 11 colours I can try and for $3.99, I might get a few more. I've got my eye on you #15.

Remember, you can use the code below to get 10% off on full priced products from Born Pretty Store.


Til next time, 

Laura


Disclosure:This product was purchased by me

Sunday, 8 September 2013

Sassy Paints Guest Post

Hello, hello! I'm gonna keep it super short today. I've written my first ever guest post for Sassy Nails as she's starting a Sassy Saturday Guest Post series and I'm a thrilled to kick it off. Yes, it's Sunday in Australia but think of time differences. :)

This is the preview but you can check out the whole post here. 


Enjoy and let me know what you think!

Till next time, 

Laura

Friday, 6 September 2013

Pastel Stud Wheel by Born Pretty Store

I'd consider myself a fan of Born Pretty Store but I haven't gone past ordering the basic gold studs and glequins from them even though they have a MASSIVE range of nail art supplies and they are so cheap. A month ago, I placed an order for a heap of different rhinestones, a textured polish and colorful studs, all which I believe are recent additions to the website.

Today, I wanna show you the Pastel Stud Wheel, which actually has a much longer name here, that I have fallen in love with. I can be indecisive when it comes to handing over my cash for products, i.e. shopping, and I have to make sure I'm getting the best deal. I was particularly happy with this wheel because it has two shapes in six different colours each for US$7.59. If I was to buy a one colour and one shape I'd have paid  US$2.99 on special (US$4.99 otherwise), but there would be no variety and I wasn't guaranteed to like them. 

I'm loving this idea of doing skittle manicures to show more colors and it almost makes me feel like I have created nail art :) . Here's my latest.


The accent nail was supposed to be covered in the pastel studs but I started to get slightly frustrated so I kept it simple.


I start to believe photo spamming is the way to go for this blog, so please click on the page break for more photos and materials used. :)

Monday, 27 May 2013

Leather, Tats and Studs

I've had this post lined up for about a week because I knew I would get itchy fingers to post but have no time to paint my nails. It's the last week of semester after all...

I present to you yet another version of this technique with a little extra. I used Nubar Toasted Marshmallows from their early 2012 Jellybean collection as a base for all fingers. I then  applied Rimmel Matte topcoat to my middle and ring fingers and pressed my trustworthy, it-came-from-scrap-foam sponge to give it the leather effect. 


On my ring finger, I stuck some black 3 mm studs from Dollar Nail Art and applied the gold 2 mm from Born Pretty Store on each side of the row with matte topcoat so the textured effect wouldn't change too much.


The fakes tattoos  I used on my index and pinky came from a pack of Ed Hardy tattoos I got from the $2 shop last September, of which I only used a couple and was left with a heap. I chose the below design first without nail polish on because well, it didn't look that pretty and I didn't mind ruining it.  Turns out I really like the way those curls and forehead looked so I decided to use it again on nail polish.
Chinese Dragon. Source
I cut the tattoo to fit my nail bed and applied along the length of the nail without trying to bend the paper to stick it to the sides. Instead, I wet my foam sponge that I used above and pressed it against the tattoo so it would soften and mold to the nail slowly.  Even though the fake tattoo didn't apply wrinkle-free, the softness of the finish of Rimmel Matte topcoat improved the look greatly.


Oh goodness... Don't look at those dry cuticles. They're awful.

I really liked the overall look and it was really fun to wear. 


The position of the black studs was slightly off and they managed to snag on a couple of things as they didn't sit completely flat on my nail. Oh well, lesson learnt. 


One other thing I was really proud of was the fact that I've managed to not only create a dupe method for Nails Inc. Noho Leather Effects, but also have created a very similar dupe for Soho Mews with a polish I'd managed to write off because of the funny colour. Then again, I don't own Soho Mews but there are plenty of swatches out there like here or here.

Toasted Marshmallow by itself. It's growing on me... Slowly.

I just have Shoreditch Lane, the burgundy colour, and Old Compton Street, the grey blue oneto recreate and I could say I saved myself about $75, which I could totally use for a polish haul. Completely justified.

What do you guys reckon? Are you a fan of the textured polishes? Do you own any that you love?

Till next time, 

Laura


Monday, 14 January 2013

China Glaze Sweet Hook Toughened Up

It's been almost four weeks since my last post. I'm not even gonna try to make excuses as to what happened, I'm just hoping you guys can still be entertained.

In the last four weeks, I have made a rack for my polish bottles (post to come) so I could see what colours/finishes I have and what I can still justify purchasing new bottles. It happened that I was buying the same colour in different brands, mostly because every time I bought a new polish, I would use it a couple of times and store it in a filing box and I couldn't really see what I already had. 

This post is about one of those polishes that I justified as I had nothing remotely similar. If you haven't guessed from the title of the post, it's China Glaze Sweet Hook from the Electropop collection that was released in the States in February 2012. I'm going to thank Tasha for this colour being added to my collection for two reasons. First, she has it on her stash and has let me use it a couple of times, each time in only one finger though (because i was using one colour/finger to create a skittle not coz she wouldn't let me), I fell in love nonetheless. Second, she pointed me towards eBay as the place to get cheap China Glaze. I got mine from this seller for about $7 bucks. 

I present to you my version of Sweet Hook. This polish was sooo sweet, it got me hooked... Bad joke, I know. It was almost like a dad joke.


I've mentioned before I'm not usually a fan of pastel and light colours but I'm warming slowly to them. The swatch above was done with two coats of this almost flawless formula. I felt like I needed to take some of the sugary goodness of this colour away and added some 2 mm square studs from Born Pretty Store. I used Manicare's Hi-Shine Top Coat to stick the studs and to finish off the mani. I really like the combination of the lilac and gold. What do you guys think?

One other thing that I have managed to do in this post is to take close-to-accurate colour pictures. The photo below shows fairly closely the actual colour of the bottle. I'm really proud of that! Woohoo! I have to admit, I have been trying to make my skin look paler that it actually is. I guess it's like looking at glossy magazines and having their expectation of beauty to  match reality.


I hope you guys can stick around. After building the polish rack, I discovered I have close to 300 bottles, which need to be put to good use.

Til next time, 

Laura 

Wednesday, 12 December 2012

Glitter Skittle

Not sure if you guys have noticed but skittled manis rock my boat. In this occasion, I ended up with a heap of different coloured glitters thanks to Tasha's stash. I would say Tasha has a very different taste in polishes that I do. She tends to go for pastels and lighter colours while I usually go for bright colours and in your face finishes. It's actually quite refreshing to see (and use) someone else's stash to try something different and expand the my colour horizons. Or I could say I just got more lemmings.


Pointer finger: Mirenesse in Forever Pearls and DBP in Jane
Middle finger: Colour club in (I think) Harp On It
Ring finger: OPI in The Living Daylights
Pinkie: China Glaze in Sweet Hook and glequins from Born Pretty Store

I can't actually remember the name of the polish on the thumb so I'll get back to you guys soon with that one.

For the top coat, I used Tasha's Seche Vite. It was my first experience with this top coat and I can see why it is so popular. All the glitters that I used are completely smooth and I wanna see how long they last. I guess I'll keep you posted on that one too.

Till next time, 

Laura

LinkWithin

Related Posts Plugin for WordPress, Blogger...