Showing posts with label Bloom. Show all posts

Monday, 14 April 2014

GOT Polish Challenge: Coral

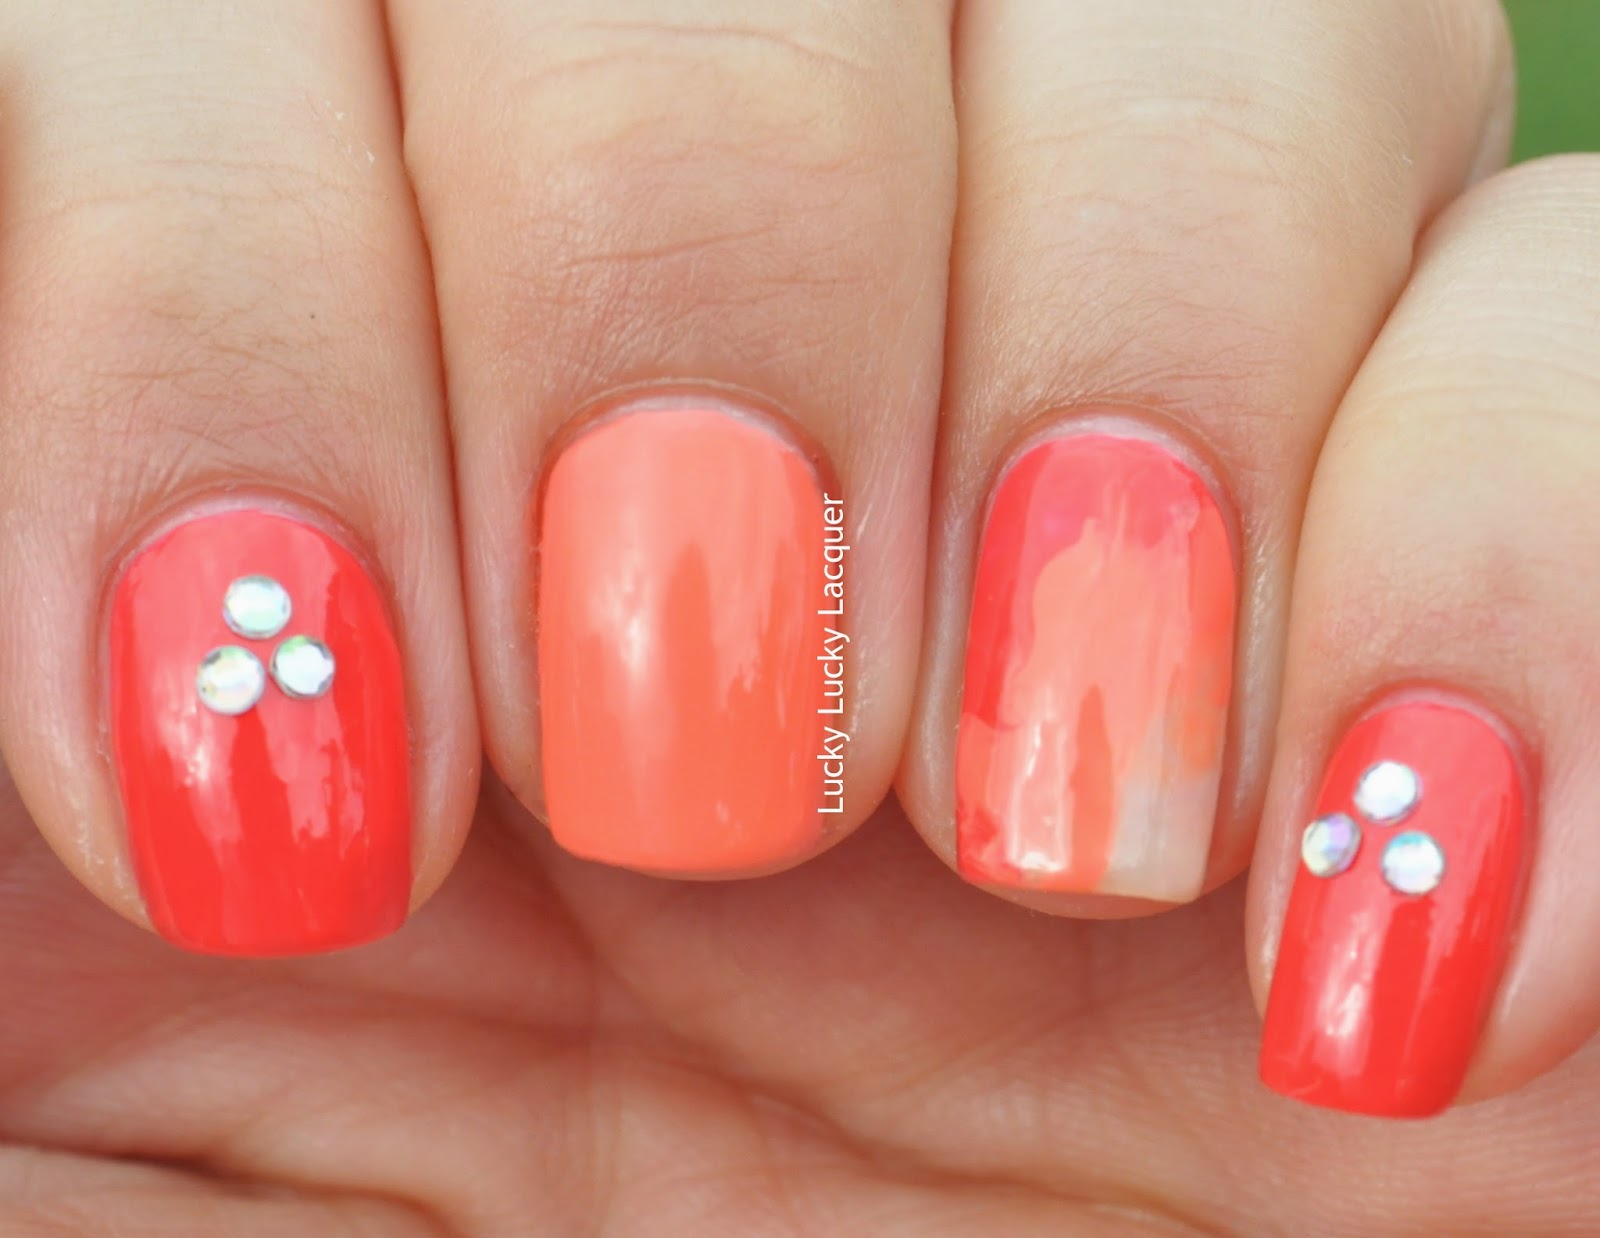
I should be calling this challenge Golden Oldie Monday since I've managed to start the posts from Wednesday night but don't end up publishing them until Monday. Anyway, I didn't think I had any old corals that fell into the category of a Golden Oldie until I looked up and Lisa II by Bloom, a boutique Australian brand, that was staring at me with wide, sad eyes.I bought Lisa II back in June 2011, along with Eddie, and since then it has been used in a lot of good and bad milestone moments for me so I'm presenting this in a bitter sweet manner. I also used Essence's C'est Le Vie! that I rediscovered since I created this mani, I know I had a whinge about it then but I think the formula got better since it got a little of air in. 


I started with two coats Lisa II on my index and pinky fingers and let them semi dry before attaching the rhinestones to the tacky polish. I then used two coats of C'est Le Vie! on my middle finger and thumb with one coat of HK Girl Top Coat to seal it. For the dry marble, I dropped three thick diagonal lines of the polishes above and Essence's Give me Nude, Baby! and squished it with a plastic bag. 


I didn't use any topcoat on Lisa II or the marble as they came out quite shiny the way they were. I also noticed the Bloom polish was slightly see through, which makes me think this is a crelly. Here I was thinking I didn't have anything like it for ages but I obviously didn't know about polish when I got it.


I think I might need to start doing the next prompt so I can get it done by at least Friday. Hehe! 

Till next time, 

Laura


Wednesday, 25 September 2013

33 Day Challenge: Most Used Colour Polish

Don't forget to enter our giveaway here!

After some clarification of this prompt, there was no doubt that a red  was gonna be the feature of this post. Before I started blogging, I mostly only wore red and I would get different brands with different finishes to satisfy my cravings for all things carmine. Then one day, when I was holidaying in Melbourne, I came across this tiny little shop (which no longer stands, I almost broke in tears when I found out) for the Australian brand Bloom Cosmetics. They had all their 80-ish colours of nail polish displayed and I was in polish heaven. Being the red lover I was, I picked out Edie, a slighlty-blue red with a buttery formula. It was the perfect red for me and it was sort of like finding the perfect red lipstick but for my nails...  That was in June 2011 and for about eight months after that, I wore it pretty much non-stop. 


Unfortunately, the formula hasn't hold up very well  and it has gotten thick and unmanageable. I added about 20 drops of thinner and the formula was just good enough to paint my nails without having to drag it on the nail bed. At least, I only needed one coat for full coverage. :) Swatch above is done with one coat of Eddie and two coats of Sally Hansen Insta-Dri topcoat. 

So this is a challenge, right? A simple swatch wasn't going to do but I managed to get stuck with what to do next as I usually wear red by itself. I took out some studs and caviar beads I got from eBay a while ago and had been sitting in my drawer for a while. I put on the caviar beads one by one on my ring finger and pressed them down with my fingers to dint the second coat of topcoat. They seemed to hold on quite well for a little while and it was a lot easier than trying to pick them up with a dotting tool and clear polish. I then attached the studs to the rest of my nails with some clear polish. 


As you may have noticed, the polish bubbled up like crazy once it dried. I can imagine this happened because of how thick the coat I applied on the nail was. I'm not sure if i'll keep adding thinner to see if it'll get better or just let it go. I still love this colour. I'm just disappointed that I didn't take better care of this baby! The worst part... This shade is no longer on sale...


Even though Eddie might be unusable now, I'm happy with the design and the fact that I'm trying new things that I wouldn't have otherwise. I was almost going to do a safe-for-me tape mani until I realised that's the next prompt. 

Check out other 33DC entries


Till next time, 

Laura

Monday, 29 October 2012

End of Semester Manicure

Well... Technically the semester isn't over and still have about four pieces of assessment due in the following two weeks but I couldn't wait to post again. 


I've been wanting to do this fish braid technique for ages but I didn't find the time or I had disastrous attempts at it. As always, I found on YouTube on MissJenFABULOUS channel, and I loved it. Here's my attempt.


I got home on Friday night, after having three assignments due that day, and started making the braid on my ring finger which took  F O R E V E R and painted the rest of the nails on Saturday morning.  

Polishes used:

Purple: Dubai by B Collection by Bloom
Pink: Cologne by B  Collection by Bloom 
Gold: Goldie by Bloom Cosmetics
Top Coat: Rimmel Pro Matte Finish


I've also learnt the very important lesson of cleaning up the cuticles and how much better it can look when the polish is fairly even. I grabbed an old eyeliner brush and tried it out. It's OK but i don't think it will stand the polish remover for much longer. So it'll be my quest to find a good one.

I'll leave it short and sweet for today,

Till next time. 

Thursday, 3 May 2012

Welcome... To me?

Well, first of all hello.

For as long as I can remember I have always been a fan of makeup. Stealing my mother's lipstick. Done it. Making a mess with powder in the bathroom. Check. Pretended to go to a party with all that make up on. Yes. It didn't help that my mother used to send me to kindergarten with lipstick on (only for special occasions and always very sheer). I had a definite moment with nail polish in grade six, though. It was sort of love at first brush and the story goes something like this... 

The monthly magazine, that I could afford at the tender age of 12 with my then-non-existent pocket money, featured an article about simple nail art and included a cut-out section of tiny little pictures and letters to stick on your nails. It showed techniques like using sticky tape to create geometric shapes and how to get simple stencils like love hearts, stars, etc. I was in awe, I wanted to do all of it, immediately!!! My sister tried the sticky tape technique while I stuck the tiny letters spelling my name (lucky both my first and middle names have five letters each) on my hands. I stuck them with a very cheap, clear polish and I enjoyed them for my weekend.


The one that enlightened me, just think 1998 version 


When I got to school the following Monday, I got so many compliments, even from the boys!!! I'm sure it was my charming personality that went so well with my fashion forward nails that caused such an impact, however, from that moment on, I learnt a little effort could bring on big rewards when trying to create something pretty (for myself mostly).

For the next 13 years, I experienced with lots of colours, textures, glitters, qualities but it was mostly only one colour/texture at the time. 

The last five months, due to the fact that I can enjoy the post-paid internet and great quantities of it, I have been enjoying the wonders of the many nail art blogs on the web. It is incredibly to see all the designs and translations of trends that women (and I'm sure there are men too, I just haven't found them) have come up with. Also, the variety of nail polishes that exist on the market has left me wanting them all!! Too bad my budget is limited (or is that good?).

So thanks Tasha for coming up with this awesome idea of creating your own nail art blog and thank you further for inviting me to write on it. This is giving a reason to create pretty things at least once a week and test (what I thought was limited) creativity.

SO... After all that banter, here's my first nail creation. 


The first step for this design was for me to learn to paint my nails properly. I used to paint them with heaps of strokes and whatever was left on my skin, I would scratch off after I had a shower. It looked good but I probably wasted a lot of water trying to get my skin soft enough to just scratch it off. I have learnt three strokes will only paint your nail, not your skin, and will also give you a more even coverage with less coats.

After a week of trying (and finally succeeding!) to paint my nails within the lines, I started with two coats of Bloom in Adriana, a bright pink with very fine blue shimmer and a suede finish. It is super quick to dry, so after five minutes I applied L.A. Girl Rock Star in Supernova. This one took a little longer to dry and left it for half a day before applying the next coat. When the glitter finally dried (to the no smudge point), I put sticky tape to 
on half my nail to apply essence Colour & Go in Hard To Resist. Finished it with Cutex Top Coat and done. 


This look reminded a bit of the title card of Saved By The Bell (remember that show?) but after looking it up in wonderful Google, it looked nothing like I had recalled. I'll just say it reminds me of the 80's. The hairy glitter is very 80's, isn't it? 

On one last note, I discover the glitter nail polish though this post. It looks amazing in the photo and was  so happy to know that I could get it at Groove Chermside for $2.50. I could not believe my luck! It looks really good when the light hits it at a good angle but it takes too long to dry and more than two coats are needed to get a good coverage of it. I guess if you have the time, patience and drying drops, this is a perfect. 


I think this first post has pretty much covered everything . A bit of personal information, the actual nail "art" (I'm not sure I should call it that yet) and even a small review.


Looking forward to sharing lots of designs, pretty colours, glitters, tips and all things nails with you.


Till next time.

LinkWithin

Related Posts Plugin for WordPress, Blogger...