Showing posts with label Konad. Show all posts

Wednesday, 10 July 2013

Valentino Inspired Manicure

I love (virtually) rummaging through the online New York Mag fashion sections for inspiration for manicures. Think all those designer collections that appear on Vogue and Elle but at your, er..., fingertips for free. Today, I've got a manicure loosely based on the one of Valentino's Couture Collection dresses for the 2013 Fall.

Photo 32 from Valentino

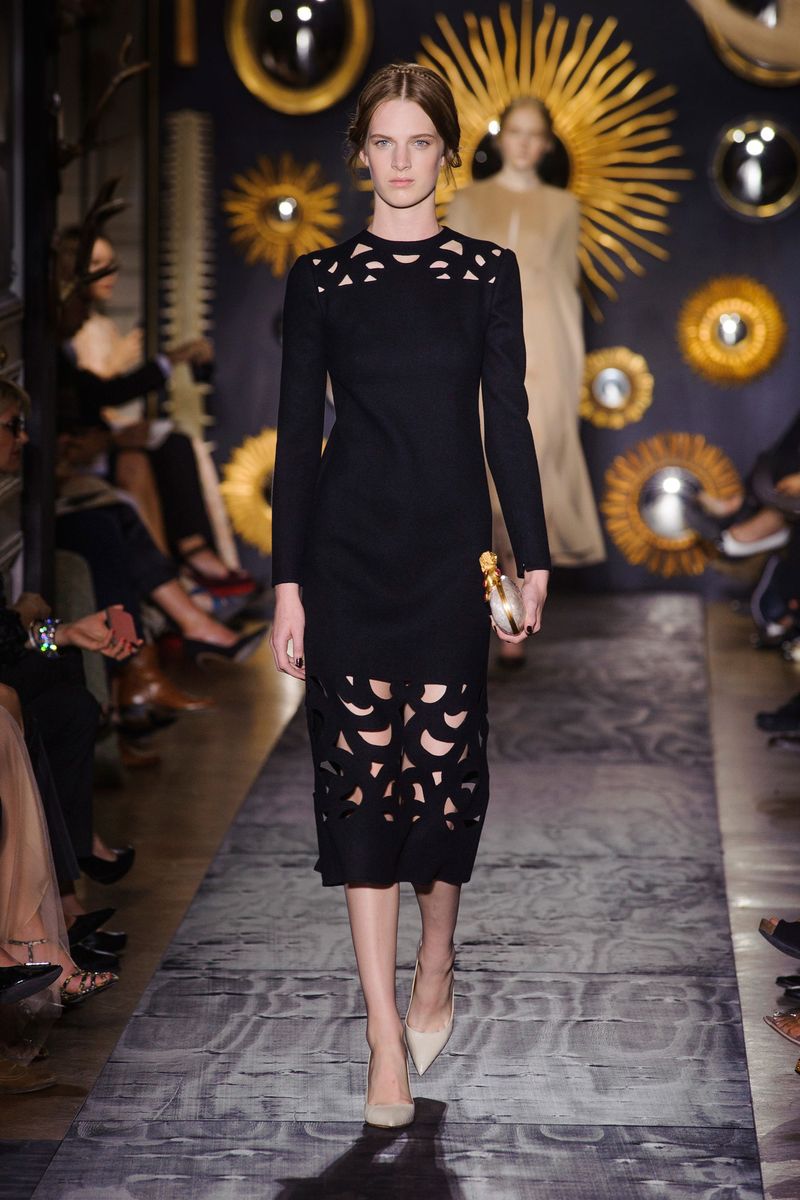
I look at the details, colours and textures to see how they can be translated to the nails without being too literal. When I came across the above dress I knew I wanted on my fingertips!!!

I must warn you, the details of the nail art wasn't great but I liked how it all looked together and that's the main reason I'm putting the photos up. I know it's not perfect but this blog is also part of the journey towards amazing manicures... Deep, aren't I? Haha!

I started with four coats of Sally Hansen Insta-Dri in Peatal Pusher for the nude base then stamped the pattern only half way up the nails with Bundle Monster's BM-201 plate using Konad Special Black polish. I sealed it with a coat of Seche Vite to make sure the stamping wouldn't come off when I placed the stickers for the half moons. I don't actually know if that would happen but I wanted to be safe rather than sorry. 


Once the Seche Vite was dry I put on half of a round sticker in each finger and striping tape on the tips as french manicure guides. I carefully painted  Ulta3 Black Satin on and removed the tape and stickers as soon as I was done with each finger. Finished it all off with one last coat of Seche Vite.


There was a lot of smudging, crooked half moons, bad and excessive clean up, major shrinkage on my pointer and the french tip lines weren't as crisp as I had hoped.


The photos weren't turning out either and each of these photos were taken at different times because I just couldn't take a good one. I could keep going about how this was a bad experiment but one thing I managed to accomplish was to get out my comfort zone and think how I could create a mani from a dress. I think this is one of the most creative things I've come up with and that makes me a tiny little bit proud. I would  usually shy away anything that involves creating arty things.

What do you guys think? Do you have sources of inspiration?  I hope you guys enjoyed the mani.

Till next time,

Laura 


Sunday, 28 April 2013

Rainbow Foils and Waiting on Revolution

I love foils. Love how shiny they are, the variety of colours and effects you can achieve with them and mostly I love the fact that they are super easy to apply. Yes, they can take a LOT practice the get right, but once you get use to applying them they can look amazing. 

Last year I got a heap of them from eBay and Dollar Nail Store and was using them fairly regularly. The only problem, as most people that have used foils would know, is the fact that they wrinkle up like crazy and some of the shine can disappear when any sort of topcoat is applied. If you were like me and wanted to keep the shine/holo/3D/smooth effect, you would go without top coat and only sport the foils for a few hours.

Luckily, piCture pOlish has just come out with a new glitter base coat, Revolution, which also works to seal foils without wrinkling them. When I read about it in More Nail Polish, I almost fell backwards on my chair and ordered this base coat as soon as possible. Unluckily for me, I'm still waiting for my packet as I ordered the day before ANZAC Day. 

I couldn't really wait any longer and I brought out the foils anyway. I'm only going to bed after this, so if they get ruined, their memory will be held in this post.

Rainbow foils. Aren't they pretty?


You may or not be wondering, why I stamped on them without showing you the foil by itself. Well, I thought all the practice I had gotten would carry over even if I hadn't done it for a while, like riding a bicycle or ice skating. Turns out that wasn't the case and the foils looked terrible. I figured a good way to cover them up would be by stamping them. I was pleasantly surprised to see that indeed the mani looked a million times better with the stamp. I used Bundle Monster's BM209 plate with Konad Polish in Black. The stamp also makes them wearable for the day as it makes the mani a tad more subtle.

This is what the foils looked like without the stamp. Still very pretty colours but it was a baaaaaaad job. I might have to keep practicing until Revolution arrives. Very likely afterwards as well so I don't waste any precious top coat.


Anyone else crazy for foils? And so happy Revolution has finally arrived? I certainly will be when the mailman knocks on my door (hopeful with fingers crossed) tomorrow.

Till next time, 

Laura


Friday, 19 April 2013

Bejeweled: Take 2


I was supposed to have uni this morning but the floor where I was going to have class flooded and the class got cancelled. What is a girl to do with the time she would have otherwise spent commuting? Well, if you're reading this I'm sure you know the answer.

I present to you and uber-speedy manicure. I used two coats of Sally Hansen Gem Crush in Bejeweled, a small purple and larger pink glitter that takes two seconds to dry. Ok, maybe it takes fifteen seconds but you get the gist. I then applied Rimmel Pro Matte Finish topcoat but I didn't see a lot of difference as this polish dries fairly matte by itself.  Finished by stamping with Konad Special Polish in Black using Bundle Monster's BM-212 plate. I'm not sure what the motif actually is but the abstract look can also look good.


What do you guys think? I actually have done a post about 10 months ago with this polish but it was terrible! Think glittery cuticles, awkward hand position, a loooooooong post where I just kept blabbing on. You could say I'm trying to redeem myself with this one and hopefully the other one can be forgiven.

Either way, I love this polish and it's glittery goodness. I'm off to keep studying.

Till next time, 

Laura

Friday, 7 December 2012

Yay!

I had a horrible week of VERY short nails after going back to work. I had to cut and file them right down since I managed to break two of my nails... *cringe*. Now they've grown a little but but my skin and cuticles are a little bit dry. Please excuse them in the photo below, I was just happy that I have a normal length again. Yay!


Polishes used:
Coral: L'Oreal Color Riche in 305 Dating Coral
Green: L'Oreal Color Riche in 618 Santorini Lagoon 
Black: Konad Special Nail Polish in Black
Top Coat: Sally Hansen Insta-Dri
Stamping plate used: Bundle Monster BM-203

I applied three coats of the coral polish to get it opaque and then sponged on the green with some foam. It then took me forever to choose what pattern I wanted to put on the top as the gradient looked a bit strange. I think the pattern above still shows the gradient  but hides my terrible craftsmanship.

Now, onto the L'Oreal mini polishes. I'm always out for a bargain and for some reason I thought this polishes were on special when I was in Target (maybe a big '25% of L'Oreal' sign gave me that idea...) but I ended up paying the full $6.95 for each 5 ml bottle. I had use them by the time I noticed the price so I couldn't really return them, could I? I don't think any of their colours are extremely unique the two above were different enough from what I have in my stash to *cough* justify my purchase.

Unfortunately, the formula isn't great. The coral was sheer and the green is a stainer, and even with thin coats for both, it took them a long time to dry. I wouldn't recommend them or buy them again. If I want a little bottle I'll just buy an essence polish for cheaper.

Have you guys tried any of the mini bottles? Any shades that are worth the price? Or have you had a better experience with these polishes?

Til next time, 

Laura 

LinkWithin

Related Posts Plugin for WordPress, Blogger...