Wednesday 31 October 2012

Layla Mirror Effects Tape Mani *Edited*

When in doubt, reach out for the sticky tape... Yes, I'm bad at rhyming but the idea stays true. This mani is not my finest work, the lines aren't that crisp, the pink is quite patchy, the clean up left a lot to be desired, the top coat created bubbles. If you squint your eyes, it looks ok. :)

Polishes used:
Pink: OPI in If You Moust You Moust 
Silver: Layla Mirror Effects in Metal Chrome 
Black: Ulta3 in Black Satin 
Top Coat: Sally Hansen Insta-Dri


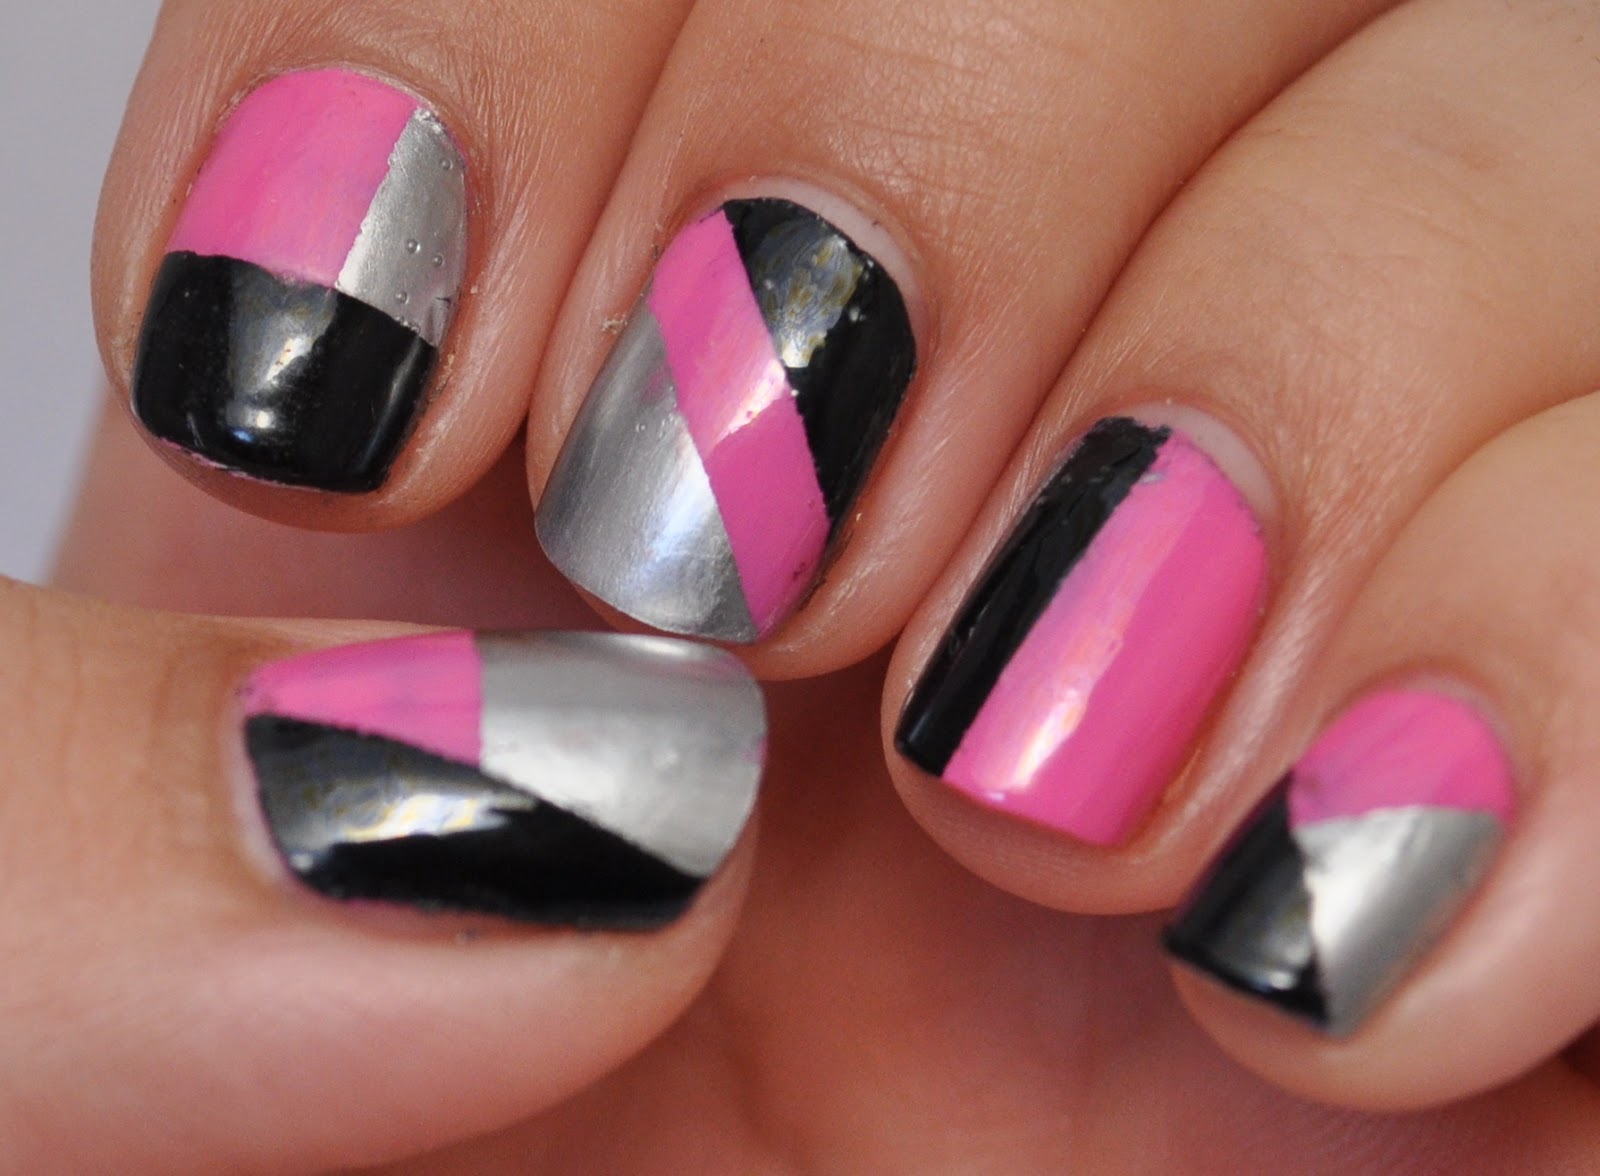
The pink polish belongs to the Minnie Mouse collection by OPI and I really like the colour. 
I originally got a mini bottle  but love it so much that I got a full size bottle. However, both bottles are very streaky and the mini bottle has gotten fairly thick, which didn't help with the application. 

******Edit******
I had to add a matte top coat to this mani. I think I may be in absolute and utter love with Rimmel Pro Matte Top Coat. It looks everything look so... soft and dreamy. and it doesn't streak like every other matte top coat I've tried. 


**************
Leaving it very short today, 

Til next time, 

Laura

Monday 29 October 2012

Are you ready for another one?

This is the mani I did today. Going to keep this blurb short and simple and show you what I've done straight up.


As a base I used one of the new essence bottles called Boho Chic. It's a beautiful peachy base with gold flakies. To tell you the truth it doesn't look that awesome in the bottle but the main reason I got is because I saw it in Oooh, Shinies! and this girl can make anything look good. I even added the matte top coat to make it look like hers. I also added the fan from BM-204 stamping plate with Maybelline Wet Shine in Succulent. I've had this polish for about six years and it does a pretty good job at stamping. Then again, I don't think they're sold anymore!!!

To seal in the stamp I used Sally Hansen Insta-Dri for the first time and I can tell you it blew my mind on how quickly it dries. However, the gold flakies made the manicure look kinda dirty, so I then followed the steps of Oooh, Shinies!. Have a look.


It looks waaaaaaaaay better matte. What do you reckon? Shiny? Matte? Let me know.

Until next time, 

Laura

I'm in a blogging mood...

Two posts in one day? Yes, that's right. Laura is in a blogging mood. And also feels like she needs to do something with her day. So here we go.

A little while ago, I went to Mecca Maxima in the city and the lady that was serving me showed me this beautiful, sunny yellow by Nars but the $32 price tag put me off buying it. When I tried it in-store, the polish had an amazing formula and wasn't too streaky as yellows can be but it wasn't enough to justify it.

So I went looking for another yellow and I came across the discounted bin at Target and found Monte Carlo by B Collection by Bloom for only $5!!! It was a steal and I've had pretty good experiences with this brand. 

I also happened to get two Bundle Monster Nail Stamping Plate Sets and was itching to try them. I applied two coats of Monte Carlo and let them dry. They were fairly thick coats and took a little while to dry but I had patience that day. Generally, I like wearing really bright colours and their boldness doesn't bother me, but I'm glad I decided to stamp over this because it was B R I G H T. 

I have noooooo idea what colours go well together so I jumped on Google and checked out a colour wheel to see what would look with the yellow. According to my understanding of the colour wheel, a purple would look good (Colour theory? Laura has no idea). I grabbed an old SugarBaby in You Rock, I don't even know if they sell them anymore but it's in my stash and I might as well use it. I stamped very sheer and it looked more maroon than purple but I really like the effect it created. I used BM-204 plate for the stamping image and use OPI RapiDry Top Coat. 


I only took one good photo of the mani  but it does it enough justice, I hope.

Till next time.

Laura

End of Semester Manicure

Well... Technically the semester isn't over and still have about four pieces of assessment due in the following two weeks but I couldn't wait to post again. 


I've been wanting to do this fish braid technique for ages but I didn't find the time or I had disastrous attempts at it. As always, I found on YouTube on MissJenFABULOUS channel, and I loved it. Here's my attempt.


I got home on Friday night, after having three assignments due that day, and started making the braid on my ring finger which took  F O R E V E R and painted the rest of the nails on Saturday morning.  

Polishes used:

Purple: Dubai by B Collection by Bloom
Pink: Cologne by B  Collection by Bloom 
Gold: Goldie by Bloom Cosmetics
Top Coat: Rimmel Pro Matte Finish


I've also learnt the very important lesson of cleaning up the cuticles and how much better it can look when the polish is fairly even. I grabbed an old eyeliner brush and tried it out. It's OK but i don't think it will stand the polish remover for much longer. So it'll be my quest to find a good one.

I'll leave it short and sweet for today,

Till next time. 

LinkWithin

Related Posts Plugin for WordPress, Blogger...