Monday 31 March 2014

Attempting to Curb My Thermal Lemming

I've loved the look of thermal polishes ever since looking at the beautiful photos from this post but wherever I looked they were sold out or about $15 per 10 ml bottle. It took a few months, a heap of unused/unblogged polishes and a low budget to realise that I would have to settle with a simple gradient to recreate that glittering polish. In December last year I acquired some most of the L.A. Girl 3D Effects polishes that are all jellies with scattered holo flakies, perfect for duplicate the look of the thermal polish I had seen.


Ok, maybe it's not an exact copy but it's inspired. I started with two coats of Dazzling Pink, a very sheer bright pink, and let that dry and then sponged on three coats of Dazzling Pink and Sparkle Ruby. I finished it all off with one coat of HK Girl top coat.

The sun was nice to show the holo but it was too bright to show the gradient properly. It looks a little too dark on these pictures.


The  gradient is a little  more visible on the photos below. Kind of... I didn't take photos in the lightbox before stamping over it but it still is noticeable, right?


I used Essie's Penny Talk to stamp what-I-think-may-be a vine motif from Moyou's Fairytale 02 plate. I like how the negative space of the stamping almost reflects the pattern in gold. It's the little things...


Did this mani fully satisfy my lemming? Yes, for a while. I'm still planning to get my hands in some thermals when the right time comes.

Till next time, 

Laura

Thursday 27 March 2014

GOT Polish Challenge: Yellow/ Peach

As much as I love the colour yellow, most of us would know how hard it is to work with the formula of this hue of polish; there's always streakiness, bold patches, multiple coats to get the colour even, bad formulas, you name it. I'm glad the GOT challenge included the prompt yellow because it's bright and I have a Golden Oldie one but I hadn't brought out because of some issues mentioned above. It was even better when peach was also included because I had the perfect colour to go with my yellow. 

Not knowing where I was gonna go with this design, I started with three coats of Nubar's Lemon, a ...er, lemon coloured polish that I got in Nov 2012. I love the colour and the formula is quite buttery but it gets a lot of bald spots and it takes foreeeeever to dry. I didn't use any quick drying top coat because I'm not a fan of super thick nail art so I just let it air dry. The tackiness of the polish made me think of the way some people apply foils without glue so I figured it would be a good plan to bring them. I've had most of my foils since I started posting on this blog so if that doesn't fit the theme, I'm not sure what would.


I attempted to apply a Marble foil onto the polish but it seemed the tackiness wasn't the right type to get the foils tuck but it would catch any piece of fluff. Hmm... I free handed a nail foil glue chevron, let it get tacky and stuck the foils. It turned out a lot better than I expected but it wasn't perfect. I feel I need to mention, the wrinkles on the foils came from me rubbing the glue with the brush once dry to put another layer on but it created ridges. part of the charm, right?


Then I remembered I wanted to use Sinful Colors' Hazard as my peach polish. I got it sometime in Dec 2012 and it has been one of those polishes I reach out for when I need something quick, it's almost a one coater and the formula is OK.  Then again, I free handed the chevrons and let them dry. 


The edges of the foils seemed a little too rugged in comparison to the peach lines so I brought out my Topshop Nail Art Pen in White and tidied the edges. It wasn't perfect but it looked better. Once I was happy with the design, I applied two coats of Picture Polish's Revolution to seal the design and the foils.  


Now this design reminds me of two things. The first one being old school pencils, you know the yellow ones with pink rubbers on top; I'm glad I didn't draw the foil edges black or there would have been a lot more resemblance. The second one would this post of mine where I swore to recreate the mani and show it when it came out better. So here it is, unintentionally and not entirely the same, but done. 


I'm quite happy with the result and the fact that I pretty much winged it. Most of the time, when I wing it it turns out baaaad. Anyway, there are some other awesome designs below, so check them out. 

Until next time, 

Laura


Thursday 20 March 2014

GOT Polish Challenge: Ruffle Mani

I've seen ruffle mani plenty of times but, even though there are some very talented ladies out there that can do wonders with this technique, I have never been enticed to recreate one as they seemed a lot of work... Yeah, that's my lazy side popping out. I figured a simplified version would be more suitable for me and it wouldn't put me completely off doing another in the future. I don't even know if I've done the ruffles right but here's my take on the prompt. 


I started one coat of Jacob's Dream from the The Twilight Saga Breaking Dawn Collection from Essence (one of my longest named polishes) that was given to me by Tasha in a swap sometime before Christmas 2012. It's almost a one coater so I tried applying a medium coat slowly and smoothly hoping I wouldn't have to do two coats for the base. That, people, is exhibit B of my laziness. After the first coat I applied one coat of HK Girl Top Coat to help Jacob's dream to dry quickly.


Once that base was dry I created the ruffles with OPI's Goldeneye, acquired in January 2013,  letting it dry and then using Jacob's Dream for the following ruffle and so on and so forth. I used the brushes from the polish bottles and I thought the were easy enough to control, however, looking at the unevenness of the ruffles made me realise otherwise. I finished it all off with one coat of the same top coat used above to even the six layers of polish out. 


I created this mani last night and I knew I had to brig out out to the sun but it's not my usual mid-afternoon sun that makes everything look really good but the midday sun that washes everything out with its glare. But I guess that shows how sparkly this mani actually was.


I like this first attempt at a ruffle mani (if that's what we are calling it) but I know it's not my best work. I guess I'm gonna have to try it again...

Till next time, 

Laura


Sunday 16 March 2014

Sunny Holographic Mani

Hello, hello! I was feeling inspired outside the GOT challenge and the Revlon Parfumarie range; this stimulus arose by looking at some pretty holographic polishes in the sun and let's face it, who doesn't like holo on their nails?

I started with two coats of Union Jack Black by Butter London in all but ring fingers, let it dry and applied on two dabbed coats of L.A. Girl in Supernova on the prepped fingers. While that was drying, which btw took forever, I applied two coats of the silvery holographic goodness that Ozotic 509 is and let it dry. I then stamped what I would like to call the stained window pattern from MoYou's Suki 04 plate with Konad's Black Special Polish. I topped all fingers off with one coat of HK Girl topcoat that helped the drying time of Supernova.


I ended up getting a lot of shrinkage on the black nails and usually I would point the finger at Seche Vite for that terrible trait, but this time I'm pretty sure it was Supernova's clear base and my piling of it on the nail. It ended up looking very thick and I actually had  a couple of the black nails pop off in one piece in the shower. :(


It was really pretty while it lasted and very rainbow-y. Blurred photo for effect.


And some  photo spam because you can never have enough holo!


Yeah, that's it from me. I'm just hoping more inspiration comes my way.

Till next time,

Laura

Thursday 13 March 2014

GOT Polish Challenege: Purple

My purple Golden Oldie polish without doubt would be B Collection by Bloom in Dubai (which is no longer in sale!!!). I have done a few posts praising it and showing it as a base and part of nail art. Since I got Dubai, I have gotten a few other purple shimmers by different brands that may have their own qualities but this one has a very special place in my heart. 

For today's challenge, I wanted to create a white based purple gradient with glequins but that turned out to be a terrible experiment. Then I had recalled this post from Penny Pinching Polish, where she tries a heap of polishes for stamping over black and white to see what works. I never really though of using sheer-ish polishes over black thinking that they wouldn't show up. Dubai as a stamping polish never crossed my mind so today was a good day as any to prove that this was a good all-rounder polish. 


The base was done with two coats of Union Jack Black by Butter London and once dry, I stamped it using Dubai and two patterns from the MoYou's Suki 04 plate. I topped it all off with one coat of HK Girl Top Coat. 


I was stoked with the way this turned out. The stamping gives the black a very subtle depth in the shade/artificial lighting but once it comes out to the sun this mani really lights up.


I didn't think I would be able to love this polish anymore but I just can't stop looking at the multicoloured shimmer. Isn't it pretty?


I had some trouble photographing the shiny version of this mani so I matted it to make it easier. Unfortunately, the matte top coat killed the shimmer and left some  bad brushstroke marks so I went back to shiny after taking the following photo.


Yeah, I like the shiny better.


I'm pretty sure Dubai is gonna stay on my 'favourite' pile until it runs out. 

Till next time, 

Laura


Sunday 9 March 2014

Revlon Parfumerie in Surf Spray, Stamping and Colour Matching


I'm gonna include three bits of information in this post so I'll try to keep it as concise as possible. 

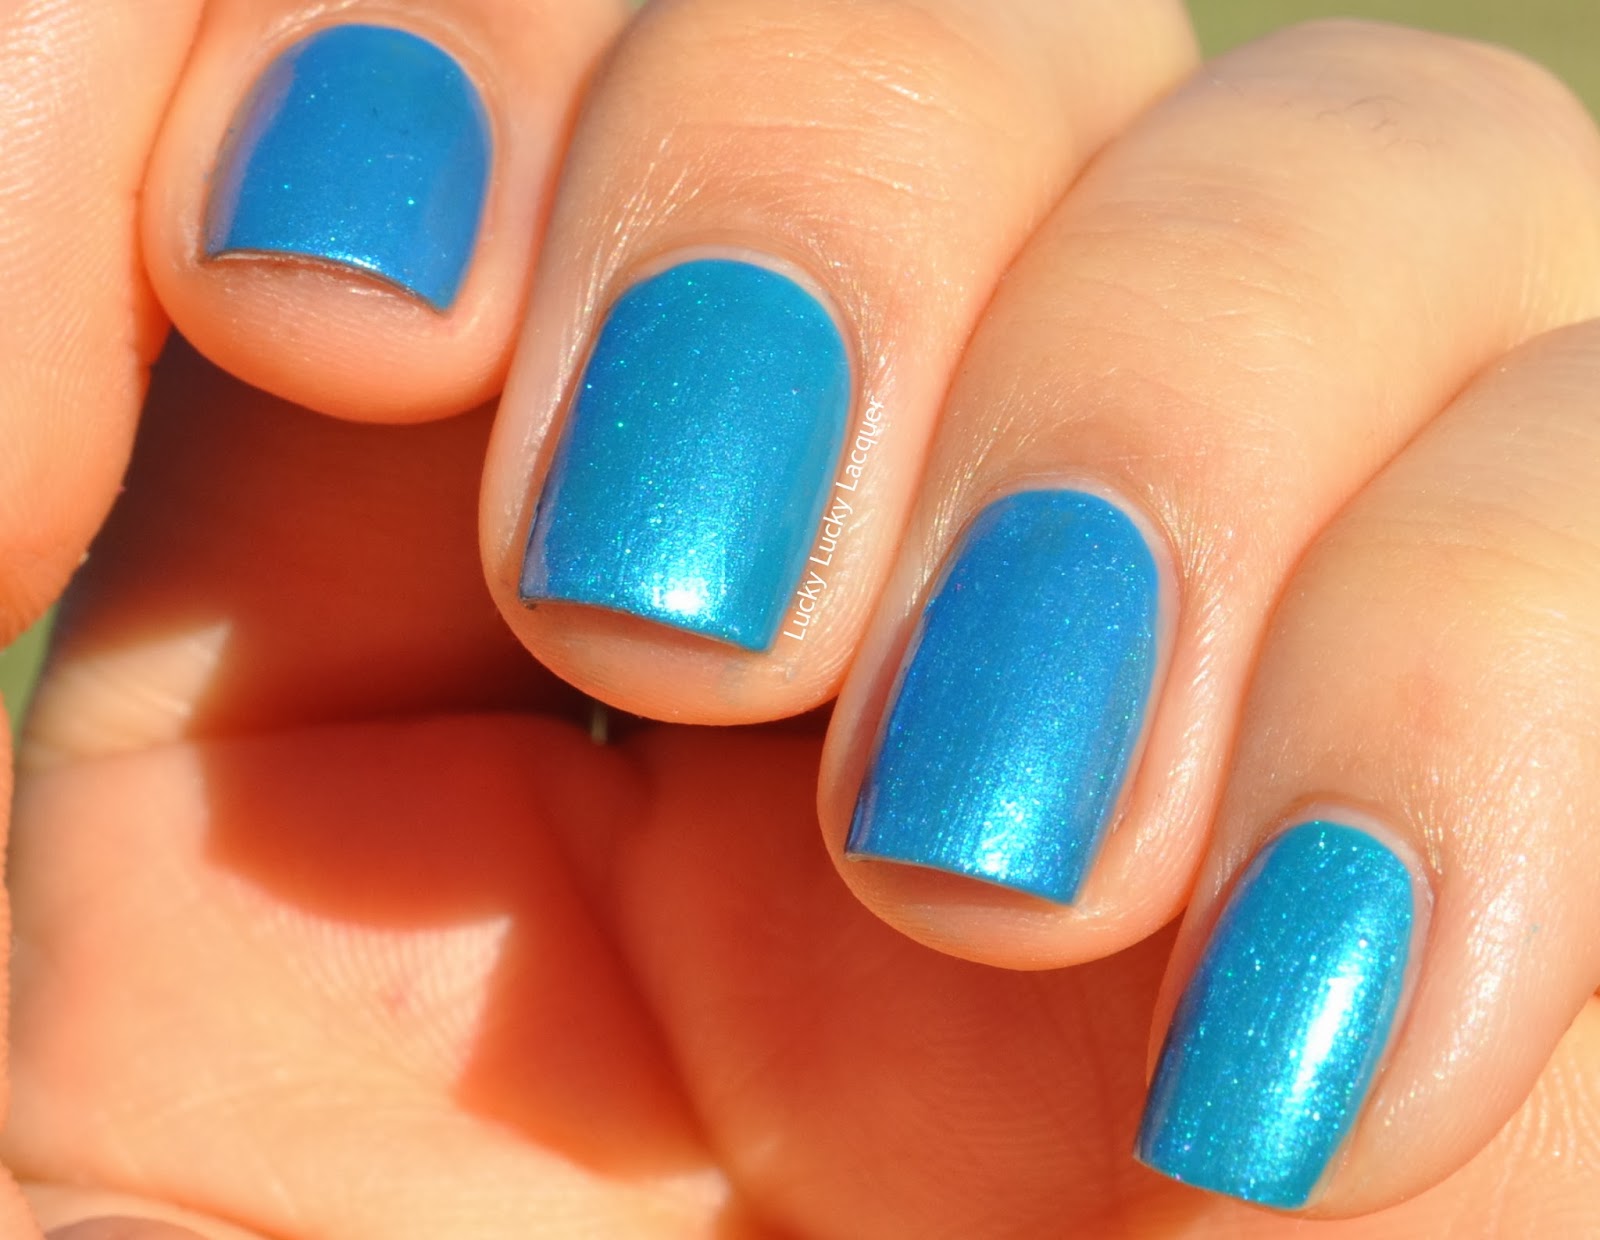
First and foremost, I'm gonna show you another one on the Revlon Parfumerie polishes I have recently acquired. Surf Spray is a slightly-leaning-towards-aqua blue shimmer with light blue and purple almost flakie-like, tiny glitter. It is a rich colour on the bottle but it doesn't fully translate to the nails; not that's a bad thing, it looks different than expected but it's still pretty nonetheless. 

Surf Spray is very sheer and it can take 3-4 coats to reach full opacity; I may have cheated a little and put some undies on to make sure this dried quickly and I didn't use too much of the polish.  Can you tell I used two different polishes for the base?


There's not a lot of difference but if we must, I used Max Factor Mini Nail Polish in Candy Blue on my middle finger (left in the below photo) and Essence's Let's Get Lost on my ring finger (right). I could see a very slight darker duochrome effect with Candy Blue but that might have to do with the fact that CB was the darker base.


After all that, I used one coat of each base colour and one coat of Surf Spray on each nail. There was no change on the depth of the polish whether it had the 4 coats or the undies on. The formula is pretty good and stays where one puts it with the brush. It can get a bit streaky but careful application can solve the problem, if that's something that bothers you.


Oooh! I forgot about the scent. Surf Spray could be interpreted in a lot of ways but these guys seemed to go along the way of washing powder and marine scented hand wash. It's one of the scents that has grown on me and it's not overpowering, so leaving it on makes me feel like I have clean hands when they may not actually be. :/

Now for the stamping, I used an old Sally Hansen in Antique Bronze that I bought for stamping about a year ago because of the colour but it turned out too sheer; now that time has passed, it has gotten a tad thicker and it starting to stamp well on certain colours. The design came from MoYou's Suki Collection - 04 plate and I'm not sure if you've noticed but my pinky and ring fingers mirror the pattern on my middle and index fingers. Super revolutionary, right? I topped it all off with one coat of OPI Mate Top Coat. 


Now for the last part of the post I'm gonna keep it super positive. I am rubbish at picking colour combinations. I usually have to consult a trustworthy colour wheel to see what may look good together and pray that it actually turns out OK. That was until today. Looking for colour wheels on Google, I went past the first couple of results and discovered this interactive colour wheel by Adobe. I would have never thought of the combination above by myself so I was super happy that I could choose a colour close enough to the base and discover that a brown would be a good combination. Considering the base was a shimmer, I figured a simmer would be good. Voila! A good combination.

I've been playing around with it all afternoon and picking polishes from the rack to see future combination and I'm pumped to get some those out. Thank you whomever come out with it!!! I'm hoping by putting this here it might help someone else, maybe...

That's it from me, I wanted to keep it short and I'm still babbling on.

Till next time, 

Laura


Thursday 6 March 2014

GOT Polish Challenge: Skittle

For today's GOT Polish Challenge theme, I brought out all older-than-a-year supplies (minus topcoat) to create a skittle. This design is a variation of one I had done back in Sep 2012, so the whole mani turned out to be an oldie but goldie!


I started with two coats of Revlon's Fire Fox, which was reviewed and praised here, and let it fully dry. I then stamped a flowery motif from a set of Konad-dupe plates from Born Pretty Store with Konad Special Nail polish in Black and top coated all my nails with HK Girl Top Coat. Once dry, I applied three Dollar Nail Art black studs on my middle finger and surrounded them with some gold studs I got from from BPS. I walked around the house for a while with my pinky and index finger bare for about an hour as I didn't know what to add to tie up the skittle and make it look coherent. I finished by adding a small L shape with the same gold studs I'd used on my middle finger.


I got Fire Fox, the set of plates and the studs some time around September 2012 and I actually recreated a similar mani, which I did not photograph or have any record of, but I'm pretty sure it went something like this.


What I liked the most from that similar mani was the way Fire Fox shone through the very opaque stamping polish. Look at all that pretty shimmer! I really couldn't stop looking at it.


I didn't secure the studs with any topcoat so they have already come off and taken chunks of the red polish with it so I'm gonna go paint my nails for next week.

Till next time, 

Laura


LinkWithin

Related Posts Plugin for WordPress, Blogger...