Showing posts with label Sally Hansen Xtreme Wear. Show all posts

Tuesday, 7 January 2014

January's Tri-Polish Tuesday

I'm back on The Crumpet's Tri-Polish Challenge for this month. The rules have changed slightly from last year allowing a little more flexibility. Different polishes can be used as long as one sticks to the month's colours and only one mani has to include all three colours, the rest of the month's manis need to include at least two colours. Also, as the name suggests, instead of doing the manis on the last two weeks of the month, they will be posted on Tuesday. 

Why not start with the one with all three colours? I wanted to do a mani that would mirror the colours and curve from the pinky and index fingers on the middle and ring fingers. So this is what I came up with...


Polishes used:

Orange:  Sally Hansen Xtreme Wear in Sun Kissed
Yellow:  Ulta3 in Honolulu
Red:      Essie in Silken Cord
Black:    Sally Hansen Xtreme Wear in Black Out

I used a dotting tool to create the leopard spots and striping tape to create the concave lines. The lines on the middle and ring fingers were free handed. Topped it all off with two coats of Seche Vite. 


This is a very out there mani for me but I really like the combination of colours and the way the lines on the pinky and index fingers frame the spots. However...


I did a mani with leopard spots a little while ago here and I remember them being a very easy to not get wrong. I don't think some spots are terrible but there could have been a bit more separation between the black edges to have a little more definition. Like the from my index finger


I'm looking forward to creating more manis for this challenge so much, I already have a few things lined up.

Till next time, 

Laura

Friday, 15 November 2013

33 Day Challenge: Art With The Colour You Own The Most

The colour I own the most? I thought it was gold. I always assumed gold was the most numerous in my collection so I went ahead and created the mani below. After I had a red stage a couple of years ago and after I started this blog, I moved onto gold and then to blue. Well, turns out the gold phase lasted less than the blue one and I have about three more bottles of blue than I do of gold. Considering I have over 350 polishes, I figured that a .09% margin error wasn't a big deal, right?

Once I had eyed my collection and decided that gold was the most prominent one, I took my trustworthy Sally Hansen Xtreme Wear in Golden-I. I've used up about half the bottle but surprisingly (for me, at least), I have only shown in in the blog once before this post and only as part of nail art. 

I wanted to keep this mani simple and I've been wanting to do stud-framed nails for a while so I figured today would be the day to do it. I started with two coats of Golden-I and one of Seche Vite before applying nail foil glue on the edges of my nails. I let it dry and got myself sticking some gold 'laser' studs (I got them from this eBay seller) and luckily they fitted nicely enough around the perimeter of my nails. 


I got a bit photo happy so I'm gonna leave you with some photo-spam. Enjoy.


I know it's nothing spectacular but this was a fun mani to wear for as long as the 85-odd studs stayed on their place. Check out the other participants' manis for today's prompt.


Till next time, 

Laura

Wednesday, 23 October 2013

33 Day Challenge: Abstract

Abstract: Thought of apart from concrete realities, specific objects, or actual instances.


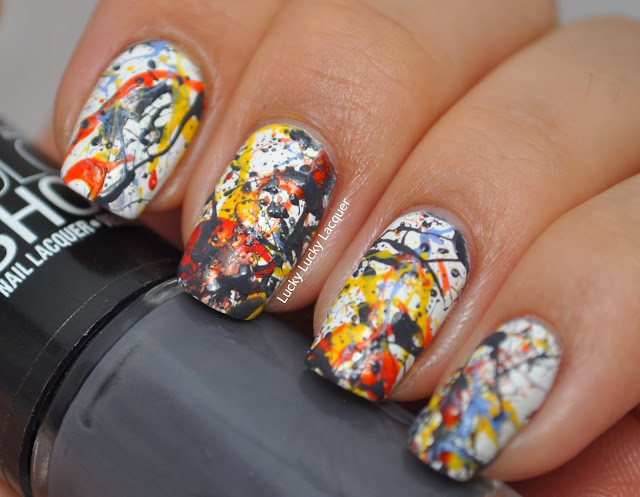
Well, that left the prompt for today on the 33 Day Challenge extremely open for interpretation. I had lots of ideas after I looked up the definition for this prompt on the dictionary. I knew what abstract meant and was aware of the heap of art/music/scientific models that are considered as such but there's something about looking up the meaning of the word to leave no doubt on the mind. I ended up going with one of my first ideas which was to recreate the abstract painting Blue Poles by Jackson Pollock. Or at least use the colour scheme and splatter the polish on my nails. 


There are a few reasons why I chose to base my manicure on this painting. Blue Poles resides in the National Gallery of Australia and was bought in 1973 for about $1.3 million, which at the time caused outrage. 

'How could you pay that much money for something that is not even art?' 

Jackson POLLOCK, Blue poles
Source

I've been wanting to go to the NGA for a while but Canberra, the city where the gallery stands, doesn't have much else to offer me at the moment and there are other places I'm saving up to go to. I will go soon and look at this 2.12m x 4.89m beauty. I might even cry a little... from happiness of course. 


Another reason is the technique Jackson Pollock used to paint his canvas by laying them on the floor and dripping the paint with various instruments. This is said to reflect the realms of unconscious experience but also respond to contemporary life. I'm quoting him here, 'The modern painter cannot express this age, the airplane, the atom bomb, the radio, in the old forms of the Renaissance or of any past culture'. To me that's a way of looking forward, a point of view that acknowledges the past but recognises the need to move on. I'm guessing saying that while everyone criticises your 'art' either takes a lot of confidence... or arrogance. I find it all so inspiring either way. That's why I would cry from happiness when I stand in front of it. *shakes off the emotion a little*


Back to the nails, the last reason why I wanted to have a little Blue Poles in my nails is that I have never done a splatter manicure before. I have tried but using a straw never gave me any splatter, it only gave me blobs of paint onto paper not my nails. I came across this Spanish-speaking Mexican beauty Youtuber, Yuya, that did a splatter manicure with a bobby pin and it seemed a little more controlled. *Edit* I originally couldn't find the video where she showed the splatter manicure but thanks to Brethil from Druid Nails, I have searched high and low and found it. Click here to watch the video. The splatter manicure starts at about 2:30 and Yuya recommends blowing into the bobby pin as if you wanted to blow bubbles *Edit*.


I gave it a go with this manicure and I'm happy with the way they came out. Mind you, the paper I had underneath my nails ended up with more polish than I did. 


Have I mentioned what polishes I used? Started with a two coats of Sally Hansen in White On and the splattered the coloured polishes in the following order:
  • Maybelline Color Show in Impeccable Greys
  • Maybelline Color Show in Fierce N Tangy
  • Ulta3 in Crazy
  • Essence in Absolutely Blue
I finished it off with one last splat of Impeccable Greys to have a closer representation of the painting. I had a mess all over my hands so I grabbed a cotton round and cleaned them up with pure acetone. I managed to clean up around my cuticles with the cotton round and I'm thinking this was easier than sticky taping all my fingers and then trying to remove it. 

I smudged my middle finger and tried to patch it up with extra grey splatter but it's jut making look messy.


I'm happy with this splatter mani and I hope I have made some justice to the painting. Please check out the other ladies' abstract manicures.


Monday, 21 October 2013

33 Day Challenge: Chinese

It's day 13 of The Crumpet's 33 Day Challenge and here I am, still sticking to it. For today's prompt, Chinese, I was inspired by so many things but unfortunately I had no time to execute any of them so I went for something simple that stuck to the theme. I also want to start using my ever growing collection of nail art supplies. I've stalled my polish shopping lately but now I've moved on shopping on eBay and Born Pretty Store for anything that can be stuck to my nails.

To tackle the challenge and start using some of these supplies, I came up with this mani. 


Which was roughly based on this vase. I googled Chinese vases and this one screamed out at me. I'm not sure of the authenticity of the claim that this is Chinese but it seemed to look like other Chinese pottery I have seen.

I started with two coats of Essence in Grumpy over a base coat and once dry, I stamped over it with Essie's Penny Talk using one of the new Bundle Monster Plates, BM-404. I got some eBay-bought flower water decals ready and started layering them on the blue and gold base but they were too see-through to show up on the darker blue base. I quickly painted my ring finger an thumb with two coats of Sally Hansen in White On and applied a coat of Seche Vite on all my fingers. I could just have applied it on my ring finger to get the white drying quicker but I thought I might as well do them all at that time.


Once that was all dry, I started overlapping the flowers and leaves on the white base and applied one final coat of Seche Vite to seal in the decals.

I really like how my thumb turned out but I didn't want to show another awkward thumb photo, so I tried two thumb poses. I like this one better...


... but this shows a lot more detail. I think. What do guys reckon?


You can sort of see the blue base on my ring finger under the white. I also managed to bump it on something so the blue flower looks  somewhat shapeless. 


Considering my past experiences with water decals, none of which have been documented in this blog... thankfully, I'm pretty happy with the way this mani came out. It makes me wanna play with all the new sheets I have just received. Stay tuned.


Check out the other talented ladies' manicures.


Till next time, 

Laura
Friday, 18 October 2013

33 Day Challenge: A Pattern In Your House

Well... Day 12 of the 33 Day Challenge called to use a pattern in your house to do some nail art. I looked around mine and all I could see were the plain bright or earthy colours but no patterns, even the towels and sheets are all one single colour. I found this pillowcase that colourful that I bought ages ago at the back of the cupboard and saw the manicure for today straight away. 


 The polishes I used are: Sinful Colors in Hazard, Sally Hansen Xtreme Wear in Pacific Blue and White On and finally China Glaze in Sweet Hook. Topped it all off with Seche Vite before letting it all dry for the next step. I hadn't shown striping tape in a mani for a while so I decided to do the smaller stripes of the pillowcase with it. I have 20-ish rolls of this tape and I'm sure that's almost a life time supply; I guess I better start using it.  


The execution and clean up wasn't great but it served its purpose. This mani reminds me of a school sports shirt or flag, at least the three middle fingers do. Maybe if I could reuse the polish base for another mani... 


Here's the pillowcase. I just realised I should have turned the pillow around so the colours would correspond to the ones on my nails but you get the idea. 


Check out the other talented ladies in the challenge.


Wednesday, 2 October 2013

33 Day Challenge: Mexican

I had high hopes and lots of inspiration for this prompt. I don't think I've mentioned it but I was born in Mexico and lived there for more than half my life (just!) before moving to Australia. This should have been my scene!!! I thought of a lot of possible designs I could create and settled for one idea  but the execution was poor. Actually, it was OK until I added top coat. Have a look for yourselves. 

I based my design on my home state's traditional dress called 'China Poblana'. The (short version of the) legend says there was a Mongolian princess that was kidnapped at the age of 8 by 17th century Portuguese explorers and eventually taken to Mexico to be sold as a slave. Due to her beauty, she was originally going to be sold to the viceroy of New Spain but a higher bidder came out of Puebla where she was finally taken. She was given the Hispanic name Catarina de San Juan and was sort of adopted, but remained a slave, by the Soza family and was taught how to saw, among other things. Even though the origin of  the dress is very hazy, most versions of the story say that Catarina was the designer of the dress, which was a fusion of her natal Mongolian attires and Mexican influences. When the patriarch of the family died she was sent to a convent and after she died at the well into her 80's, she was worshiped as a saint in Puebla until the church banned popular saints. There are as many variations to the legend as there are variations of the dress and I don't claim to be an expert. That's the story I remember from school and bits I researched on the world wide web.


Back to the nails, I used a heap of polishes and tools so I'm just going to list them.

Light Green:  Ulta3 in Jelly
Dark Green:   Ulta3 in Frog Prince
Red:             Revlon in Fire Fox
'Skirt' glitter: Rimmel in Disco Ball 
White:          Sally Hansen Xtreme Wear in White On
Yellow:         Ulta3 in Honolulu
Gold:            Sally Hansen in Golden-I
Light Brown:  Essie in Hot Coco
Topcoat:       Seche Vite

Smallest and small dotting tools and striping tape from eBay. Sticky tape from the supermarket. :)

This is one of the many versions of the dress. 

Source
I also included my thumb to represent the ribbons that are braided on the hair. I find thumb shots awkward so please excuse the following bad photo.


Before I added a topcoat of Seche Vite, there was a bit of texture on my index and ring fingers, which looked a lot better than the smooth versions. I added a final coat of Rimmel Pro Matte Finish to try and save it but it just made my mani chip very quickly. :(


I'm not sure what to think of this mani. I kinda like it because it made me think outside my comfort zone, especially the index that represents the shirt, but it doesn't look great altogether. If I hadn't applied topcoat, I would've been happier. I guess that teaches me to photograph every step of the mani!!! 

Check out the other talented ladies of the challenge.


Till next time,

Laura

Sunday, 8 September 2013

Sassy Paints Guest Post

Hello, hello! I'm gonna keep it super short today. I've written my first ever guest post for Sassy Nails as she's starting a Sassy Saturday Guest Post series and I'm a thrilled to kick it off. Yes, it's Sunday in Australia but think of time differences. :)

This is the preview but you can check out the whole post here. 


Enjoy and let me know what you think!

Till next time, 

Laura

Friday, 6 September 2013

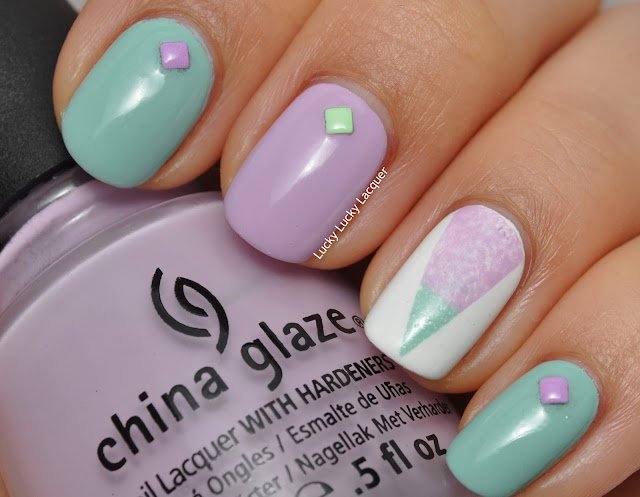
Pastel Stud Wheel by Born Pretty Store

I'd consider myself a fan of Born Pretty Store but I haven't gone past ordering the basic gold studs and glequins from them even though they have a MASSIVE range of nail art supplies and they are so cheap. A month ago, I placed an order for a heap of different rhinestones, a textured polish and colorful studs, all which I believe are recent additions to the website.

Today, I wanna show you the Pastel Stud Wheel, which actually has a much longer name here, that I have fallen in love with. I can be indecisive when it comes to handing over my cash for products, i.e. shopping, and I have to make sure I'm getting the best deal. I was particularly happy with this wheel because it has two shapes in six different colours each for US$7.59. If I was to buy a one colour and one shape I'd have paid  US$2.99 on special (US$4.99 otherwise), but there would be no variety and I wasn't guaranteed to like them. 

I'm loving this idea of doing skittle manicures to show more colors and it almost makes me feel like I have created nail art :) . Here's my latest.


The accent nail was supposed to be covered in the pastel studs but I started to get slightly frustrated so I kept it simple.


I start to believe photo spamming is the way to go for this blog, so please click on the page break for more photos and materials used. :)

Friday, 2 August 2013

Dior Inspired: Or How I Had A Little Breakthrough

I have so much stuff to put up I wanna show you guys, including new nail polishes, nail art that I've created and a few random nail related items. I thought I would start at the beginning of my list and show you some nail art that I'd been thinking of executing for a little over a month. Well, I actually did execute it but I wasn't very happy with the results so I had to start over a couple of times.

This mani is based on a dress by Christian Dior from his Fall 2013 Couture collection. I wanted to recreate the textures and line of the dress along my four fingers.


Close?

Photo 13 from Christian Dior
Source
For the satin finish, I started with three thin coats of Sally Hansen Xtreme Wear in White On and let them dry thoroughly before applying two coats of OPI's I Juggle... Men. I've had the latter for a little over a year and the formula has thickened and I think (...think) that the coverage of translucent glitter  is a better because of that.


To mirror the sequins from the dress, I tried creating a my first ever franken but for some reason or another, it didn't turn out as good as I hoped and its glitter coverage was poor. I bought a multi-coloured glitter that had the colour range that I was looking for but then again the coverage left a lot to be desired.


I decided to layer the glitters instead to make the 'sequins'. After sticky taping my fingers in the different designs. I sandwich a coat of China glaze in Electrify within two coats of Sally Hansen Xtreme Wear in Rockstar Pink. I removed the tape immediately after applying the last coat of glitter and the lines still came up acceptably crisp.


After the three coats of glitter, I applied one coat of Seche Vite to even it all out. I tried to be very careful to make sure I wrapped my tips with glitter to have a full coverage but it seems like the Seche Vite caused some shrinkage and pulled the glitter back.


As a final step, I used Rimmel Pro Matte Finish top coat on the white to give the finishes a little bit more contrast. 


Yes, my pinky is looking chunky. In my first try, it looked like a thin french tip and not like the dress. I had the idea of taping my finger again closer to the cuticle and painting over it, thinking that it would dry a little flatter. :( It looked better than it would have otherwise so I let it be.
  

Now for the little breakthrough. I'm particularly happy with this manicure for the reason that I managed to clean up white polish AND keeping the edges tidy and wearable. It took a lot of patience and time but I did it!!! 


The above photo shows my second attempt but it felt incomplete, I had tip wear after about half an hour after finishing the mani and look at the clean up on my ring finger... I had to re-try it. I'm very glad I did. My first attempt was majorly smudged and wasn't even worth photographing.

I hope you guys enjoyed this mani. It was really fun to do, even if it took me three tries to come up with something I was satisfied with.  

Till next time, 

Laura

LinkWithin

Related Posts Plugin for WordPress, Blogger...