Showing posts with label American Apparel. Show all posts

Thursday, 22 August 2013

Neon and Blue: Unintentional 80's

I'm gonna keep it short and sweet today and show you lots of pictures instead. This manicure was loosely inspired by this post from Nailed Obsession. I always had the idea that using the polish-dried-on-a-zip-lock-bag technique was to be used for really complicated or odd designs but Anthea's design changed my mind about it. I'll be forver grateful to her for the idea!!!

Off I went to paint some pink and orange stripes with American Apparel's Neons onto a plastic bag but didn't have a design in my mind when I did it. After many tries and a few polish changes later I came up with this mani. By this point, I had cut up most of the dried polish strips for previous attempts, so I only had enough little triangles for one finger.


I started with two coats of essence in Absolutely blue, a light periwinkle blue with an amazing, quick drying formula and awesome brush. With the bits of polish I had left, I cut up tiny triangles and started overlapping them randomly and gently pressing them against my dry nail and attached the stud to my ring finger with some clear polish. I topped it all the nails with one coat of Seche Vite. 


I wore this mani for a three days and I had minimal tip wear by the time I was itching to change my polish  Essence has come a long way from those 5 ml with terrible formulas (looking at you Toffe To Go...) and I really don't think that's a good thing for someone that has no self-restrain when it comes to cheap nail polish.

I'm about to photo spam you. To see more photos, click on the page break below.

Saturday, 25 May 2013

Leather And Stripes

I had a bout of inspiration from browsing through my mother's fashion bookmarks this morning that went from one idea to another, to another and ended up looking like this.


I used three coats of American Apparel Sheer in Pacific Beach topped with Seche Vite as a base, waited for it to dry completely, then taped my ring finger and finally used this method to create the leather effect.


I'm really happy the way it turned out and was surprised how clean the lines were. All those failed attempts have paid off and have left me with some decent taping skills. Woohoo!

As I mentioned before, the original idea looks nothing like what I ended up creating. It went from contrasting textures with half moons to adding a colour and using chevrons to just using tape for an accent. I thought I'd show you the dress anyway, you may see the resemblance.

Fatima Lopez Fall 2013 RTW 2
Dress by Fatima Lopez, or Lopes? She's Portuguese and
there are different spellings in different websites... Source
Keep reading to see how I created the mani.


Saturday, 18 May 2013

Picture Polish Revolution

Last year, when essence's Ready For Boarding Peel Off Base Coat came out on the shelves, I was lucky enough to get a bottle before they run out within the day. From that day on I haven't looked back and have used it for all my glitter manis and, lately, I've been using it every time I put polish on as the smell of acetone was starting to put me off. I could keep going on about how good it is but this is a post to review Picture Polish Revolution.

I was actually a bit undecided as to whether or not to post this. After trying Revolution as a base coat for glitter, I couldn't help to compare it to the PVA base coat and the difference was enormous and not in a good way either...

If you haven't seen the bottle a million times on the blogsphere, here's a picture.


Revolution promises to ease the process of removal of glitter manicures. The Picture Polish website recommends soaking the polish for 15 seconds, removing what you can and continue the process until you are done.

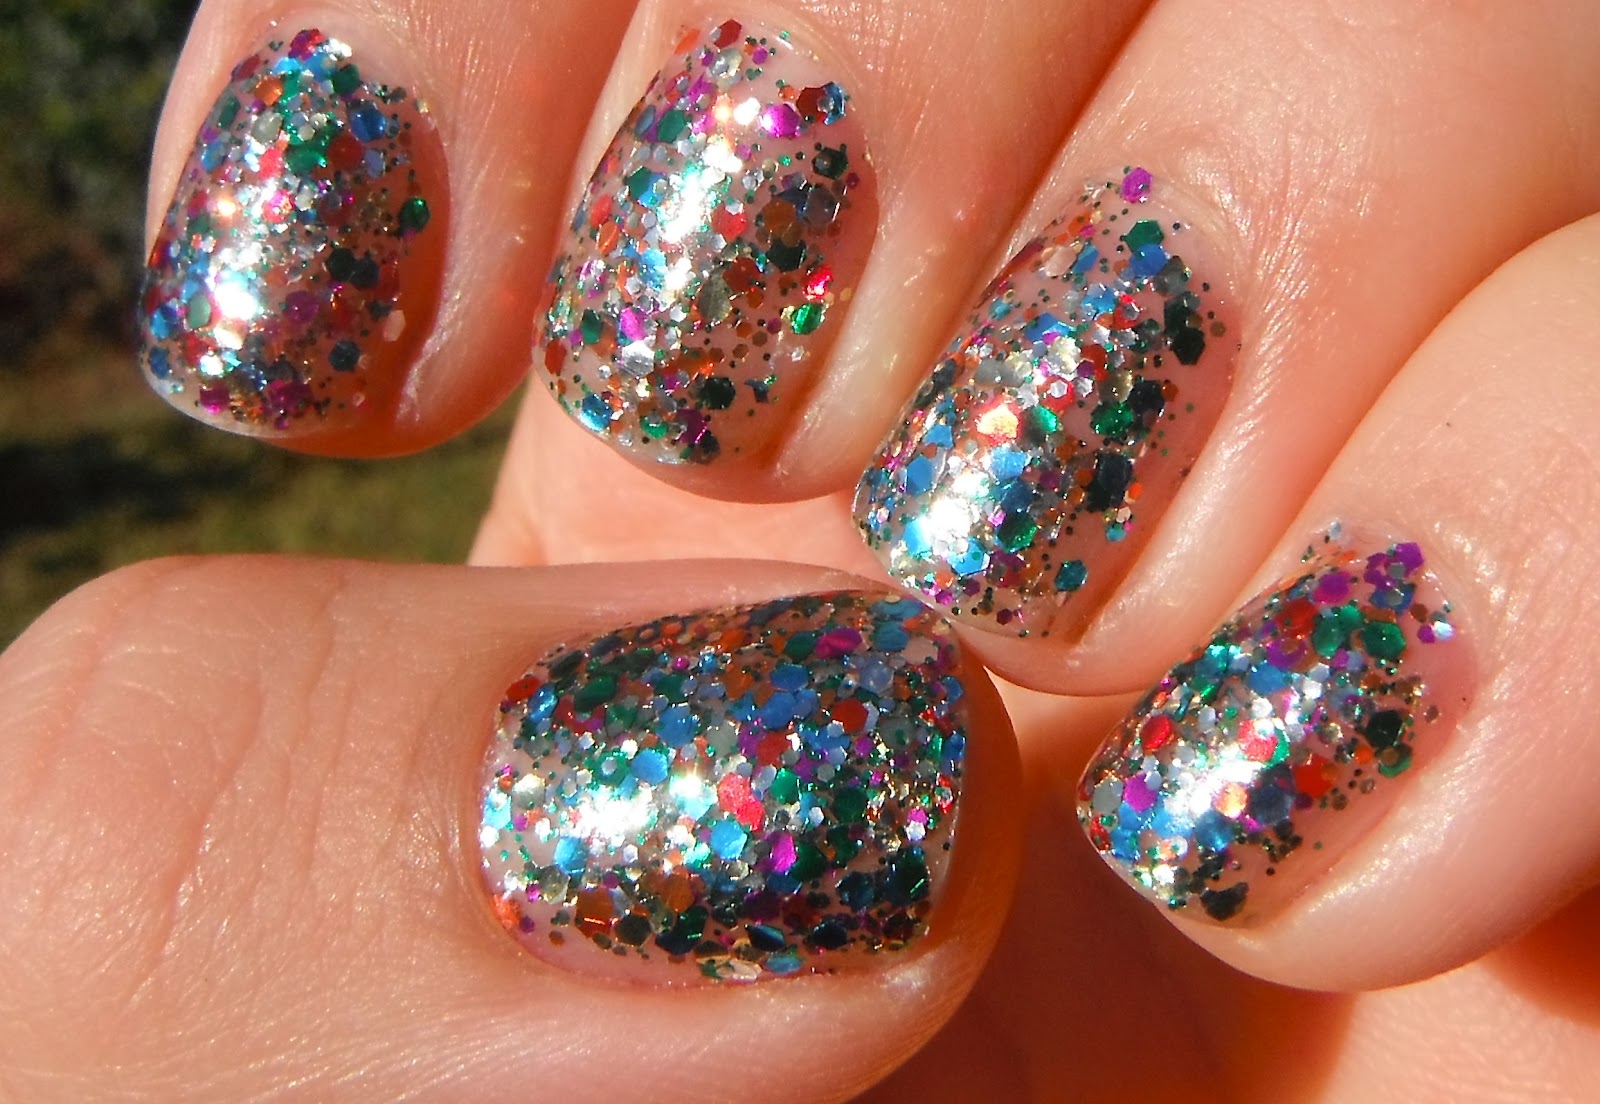
I decided to put it to the test with a mani that I would normally wear with PVA glue as a base coat. First, I applied two coats of Revolution, which dried within 30 seconds per coat, then applied American Apparel's Office as the colour base, followed by three coats of Nails Inc's Emerald, a beautiful, foil glitter, and finished it with a coat of Seche Vite.


Not my best mani but it looked really good from afar. :)  I wore it for a day to see how it would hold up. As you can see on my index finger, there was a tiny chip after about 24 hours. I'm not sure if this had to do with my application, the terrible shrinkage I got on the glitter polish from using Seche Vite or from the base coat. Either way, it's something to note.  Two things that put me off were the curling that popped up when I tried to clean up Office and the residue on my cuticles, which I had to pull off with my fingers and made the edges pretty untidy.

Now, the removal. I haven't used acetone in a while so I was hoping this would work quickly. I used a quarter of a cotton pad and worked finger by finger. I applied the pad for 15 seconds at the time to see how it would work.  


First try, nothing came off. Time to keep pressing that pad onto my finger. Waiting... Finger stretch... Waiting...


After a few tries, very little came off. Maybe I put it to a very harsh, five-coats-of-a-mani test. I then read on the Picture Polish website that you need to give it a bit of a scrub. Mine was a tough scrub and there was glitter coming off in small chunks that went everywhere. 

This is what my hand looked like after I finished and gave it a final swab with a clean  pad soaked in acetone. Excuse the yellow nails...


There was a lot of base coat residue left on my cuticles as well as glitter stuck to my fingers. It took me about 10 minutes in total to remove all the glitter, including the stuff on my skin. 

From my understanding and reading the ingredients on the bottle, Revolution forms a plastic base on your nails that dissolves a lot quicker with polish remover compared to you polish alone. I see this would be an option if you want your glitter mani to last longer than by using PVA glue as a base. I really can't find any other reason to use it... As I change my polish every two to three days, I wouldn't use it for that purpose. Quicker than removing it with the foil method? Yes. Tidier? Maybe not for me. Would I use it again for glitter? Very unlikely. I'm sticking  to my essence PVA coat.

After all this whinging, I must admit, if you haven't seen this post, I got Revolution to use as a top coat for foils. I have used it for that purpose and it works really well. I felt like I needed to post about its original purpose before I moved on to better things.

Do you guys own Revolution? Have you found it to be amazing or would you give it a miss? Any other methods you have for the removal of glitter? I'd really love to hear what you think about this product.

Till next time, 

Laura 

Tuesday, 9 April 2013

Neon Saran Wrap Mani

Or since I'm in Australia, should I call it Neon Cling Wrap mani?

Whatever name you'd like to give it, here's my first successful saran wrap manicure. I've tried it a lot of times before but it always looked lumpy or I would take off the base with the wrap. I learnt to be a gentler and it looks like it paid off.

I used American Apparel's T-Shirt as a base for American Apparel's Neon Pink. I then layered B Collection by Bloom in Miami and gently applied pressure while still wet to create the effect . 


It was actually a bit bumpy after blotting the wrap on my fingers. At the moment, all my topcoats have either yellowed so much they change the colour of the polish, or are rock solid and no thinner would save them. I'm waiting to for my first Seche Vite to arrive in the mail but it's taking forever. I was itching to post. 

Anyway, instead of topcoat, I used OPI's Natural Nail Base Coat. It seemed to even things out a bit and give it shine but it took foreeeeeever to dry and, after a couple of hours, still has a rubbery feel. It also seemed to dull the neon colour a tad. Can you tell? 


This was originally going to be the base for some tribal nails. I have been trying to get some done but every time my hands seems to get shakier/completely-uncooperative and ended up with a terrible mess. They will not elude me!!! One day, I'll draw the coolest tribal nails and everyone will be talking about them. Haha! No, not that far. I'll just have postable nail art.

Is there anything that's you love but haven't been able to recreate?

Till next time, 

Laura

Saturday, 30 March 2013

Doticure and a New Born Baby

Yesterday was a day of waiting and as we all know, painting one's nail is a very good pastime, especially when you consider drying time. I'm still trying to keep my nail art simple to avoid frustration and, while trying to think what I could paint on my nails, the thought that I hadn't done a dot manicure ever jumped at me.

I started with four coats of Mirenesse's Forever pearl, a pinky nude that has a good formula  but it can be a tad streaky. 


I used a toothpick to apply the dots with China Glaze's Sweet Hook. So far so good, but there wasn't a lot of contrast between the two colours.


Lastly, I added some dots with with American Apparel's Office, trying to fill in the spaces between the purple dots.

So here it is, my first ever doticure.


As soon as I finished putting the last dot on my pinky (see the giant blob of green?), my family got a call from my brother-in-law saying my sister had gone into labour and that they were at the hospital. I didn't really bother to fix my nails and quickly snapped up one picture of the mani, as I would be needing the camera and memory card for new baby photos. 

This is my sister's first born, which in turn makes me a first time aunt. I've never wanted kids and babies made me uncomfortable, but this little one is the most adorable thing in the world. No, I'm not getting clucky. It's just really good to see my sister and her husband have a baby that was very much wanted and, it seems, will be very loved.

Till next time, 

Laura


Tuesday, 15 January 2013

essence Snow White Glitter Sandwich

Going through Tasha's stash has given me quite a few lemmings. One of them was Essie's Jelly Apple. I loved the colour (my favourite polishes have always been red) and the jelly finish (which until now, I never owned). When swatches starting popping up on the WWW of essence's Snow White collection and its polish of the same name, I knew my lemming would be satisfied for a very low price. 

I patiently waited for Target to stock the collection but it took a few months before the display was up. I guess the release of Twilight was more important than Snow White (not on my books...). It took a few attempts and visits to two local Targets to get my hands on this puppy. I actually ended up buying three bottles, but at $3.50 each, it is still cheaper than buying one discounted Essie online.

Swatch below is done with one coat and no top coat. Isn't pretty AND shiny? I also love the fact they have a wide, flat brush that makes the application of this extremely-easy-to-work-with formula even easier.


I couldn't stop admiring the colour but after a few hours it got kinda boring and I thought 'Why not paint myself a glitter sandwich?'. I used my favourite glitter topper, American Apparel's Supernova. It's doesn't need to be dabbed on too much for an even coverage of its different size glitters and it's pretty colourful. Only applied one coat on the photo below.


I let it dry for a bit to avoid any drag and applied a second coat of Snow White. What happened to the colour of the glitters really impressed me. The glitters were either light or black and no actual colour showed thru. I'm still no connoisseur of colour theory and a lot of my experimentation is trial and error. Either way I was very happy with the result. It sort of reminded me of strawberries... 


 At the end, I added a matte top coat but wasn't too impressed. For once, I liked the shiny version better.  

Til next time, 

Laura

Friday, 23 November 2012

Saran Wrap? Sugar Spun Nails? Not quite...

I watched this video a little while ago and really liked the effect it created. It reminded me of sugar spun nails without too much of the mess. I set off to try it it today with colours different  from below but I turned into a grey, green mess. So the polish came off my ring finger and tried again.

This is what I turned up with. You can see the lines from the fan brush but they're not too defined so it looks like I tried to take some of the polish off rather than put it on.


Polishes used:
Gold: Topshop in Gilted (2 coats)
Ring Finger: Base: American Apparel in T-Shirt (1 coat)
                  Purple: American Apparel Metallic in Violet Panache (3 coats)
                  Pink: Ulta3 in Tahiti
Top Coat: Sally Hansen Insta-Dri

For the ring finger, I had to use a base as the American Apparel metallic polishes are on the very sheer side and would have taken a lot of coats to get it opaque. 

I'm leaving short and sweet today. Going back to work has left me really nappy...

Till next time,

Laura

Tuesday, 12 June 2012

In Memoriam of the Skittled Mani *Edited with photos*

This is a rather sad post for me as I am mourning the massacre I created while trying to revive a four-day-old skittled mani (the one i got with all your awesome nail polishes on Friday night). I thoroughly enjoyed having ten fantastic colours on my nails all at once. I never thought it could be so much fun!!! 

So after the four wonderful days, I noticed there was considerably nail tip wear on the glitters, which accounted for at least three of my digits. I thought a tape mani a la Chalkboard Nails* would hide the tips and give the colours that I was wearing a new life. Off I went to grab my striping tape and carefully pressed it onto my nail, cut it and re-pressed it to make sure it was stuck. I applied a thick-ish coat of Rimmel 60 Seconds in Black Out on the worst tip wear offender and quickly peeled it off. Oh, big mistake. There were no lines, just blobs of black polish over speckles of colourful glitter. 'Oh well!' I though, 'Let's try the next one'. I let it dry for about five seconds but I still ended up with a mess. 

What to do but keep trying? I grabbed sticky tape and tried to do one of these on my ring finger. It seems like I placed the sticky tape bits too close together, maybe there was a bubble in the polish or I didn't wait long enough but the half the black came off with the tape. It looked baaaaaad... Plus there was no contrast with the dark blue I was wearing and it was too far down on the nail for it to look good. I tried the last method once more on my thumb and it worked so well, I almost top coated it. Pity, the rest were so unpleasant to the eye. It all had to come off! I didn't even take a photo of it! 

I shall remember it anyway with this small tribute. 

The colours of American Apparel in Supernova have everything my skittled mani had, lots of colour and lots of glitter!

I need 4 coats to get a (mostly) full coverage and each coat dried surprisingly quick. I was done in about 20 minutes including top coat and by then it was dry to the touch. This polish is surprisingly smooth without top coat and there's no need to fish out the glitter if the brush is inserted into the bottle fully for each application. Enough of my words, I shall leave you with some pictures.


*Chalkboard Nails gives credit to Nailside for the idea of the tape mani, however, I liked the former's idea of using striping tape as I have no patience to cut so many strips of such small width. Anyhow, if my attempts keep failing with striping tape, I might have to follow the sticky tape route.

That's all from me and until next time,

Happy polishing.

LinkWithin

Related Posts Plugin for WordPress, Blogger...