Showing posts with label Topshop. Show all posts

Sunday, 25 October 2015

40 Great Nail Art Ideas - Orange Purple Green + Negative Space

This week I got a winning combo. I love negative space manis and the selection of hues was one of my favourites. As I read the prompt for the first time, I started recalling what exact polish I wanted to use for each colour. Orange  would be Revlon's Lady Luck, Purple would be the beautiful Plume and Green Room for er, the green, the last two from Topshop.  I know the orange looks like pink and the purple leans more towards the blue side  but I figure that this is more on the pastel side of the spectrum.
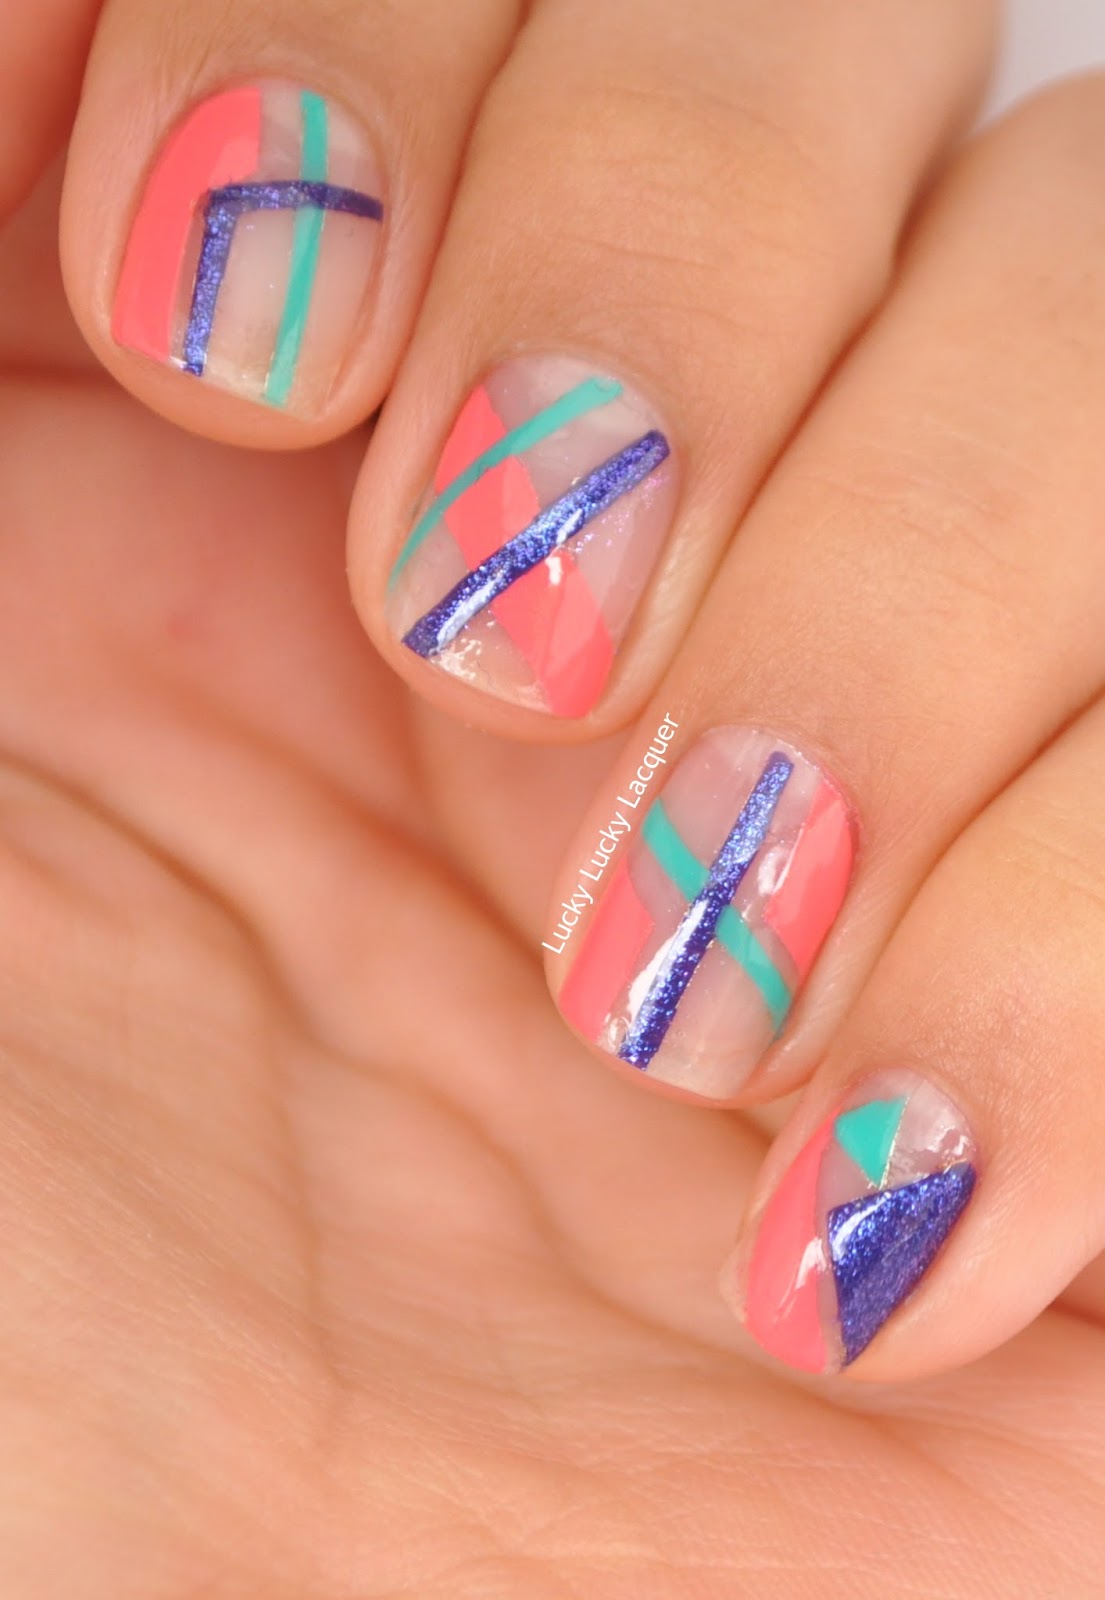

I started with no base. I know, right? What craziness is this, more on that a bit later. With some stripping tape in place, I painted on some shapes and stripes with some Max Factor's Purple Haze to give Plume a base as the latter can be a bit sheer by itself. Then painted on Green Room covering the purple with tape and finally applied Lady Luck using the same technique. Applied HK Girl Top Coat to smooth it all out and seal it in.
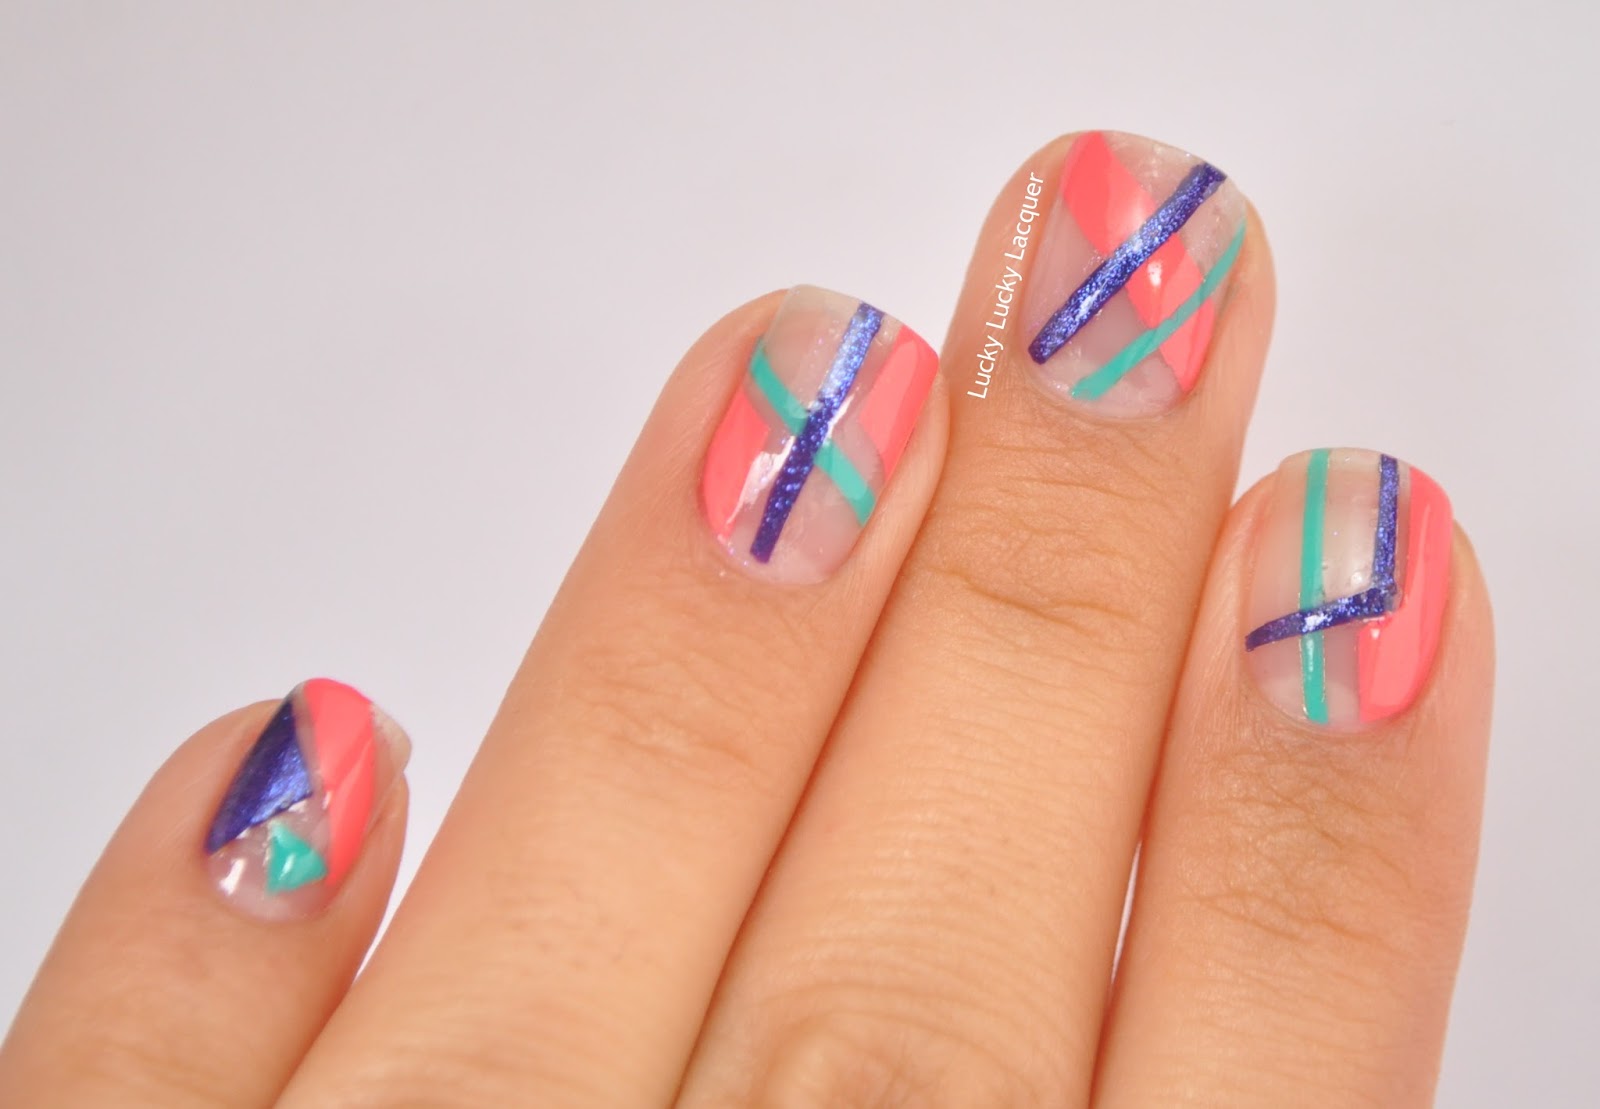

I managed to smudge on of the thin purple lines just after topcoating it but with the help of my trustworthy (and very frayed) striper brush I managed to fix it pretty well. It's hardly noticeable now. Can you tell which one it was? Hehe.


The photos above show my second attempt. My first mani (below) was actually freehanded but it felt too rough to put it up on the blog. I liked the fact that it had more polish and less free space but I figured it would take me forever to clean it up or do it with tape so I just enjoyed it for what it was and reattempted it. And because I was in such a hurry to get the next one done, I forgot to put base on. That's my story.


Till next time, 

Laura


Thursday, 24 April 2014

GOT Polish Challenge: Something Tropical

I'm back after week and half long blogging break. I didn't go on a holiday or had a emergency pop up, I was feeling overwhelmed and disappointed with my lack of imagination for innovative manis and the pressure (put on me by me and me only) to keep up with the two challenges I decided to take up on recently. I'd usually see it as a lack of professionalism to just leave for a while without notice but I was just not feeling it. This is supposed to be a hobby that I ENJOY and trying to keep up when my mind shut the creative side out temporarily makes this pastime everything but.

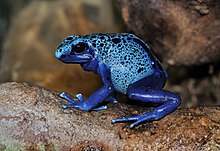
But the break helped and now I'm back with what I feel is a clear head and itchy fingers to get some nail art happening. When the 'something tropical' prompt popped out, I knew I didn't want to just do palm trees or a sunset because well, I'd be too difficult for me to do and I didn't want to get tired on my first post. So I googled tropical and after a few clicks here and there, I decided to do a blue poison dart frog skin pattern on my nails, which live in the tropical forest of Central America.


I started with two coats of Absolutely Blue by Essence and one of HK Girl top coat for the base and let that dry. I then used a wedged make up sponge and created a rough triangular gradient with Essie's Aruba Blue by tapping the sponge lightly over the base and building up the colour (I reeeally need to learn to break up my sentences). Once dry, I used Topshop's Celestial to do the outline of the spots and used American Apparel's Hassid for the black spots. Finished by cleaning my cuticles and with one coat of HK Girl top coat.


Frog used for inspiration. 

Source

This was super quick and easy to do, I would generally have to repeat at least one step in my manis but not with this one. Woohoo!


I'm really happy with the way this turned out so I could almost say i'll be back next week. Maybe... I can't promise anything. 

Till next time, 

Laura


Monday, 7 April 2014

The Never Ending Challenge: Glitter

Well, hello. What am I doing posting on a Monday? I decided to join The GLITTAH Pirates Facebook group which is hosting The Neverending Pile Challenge. The purpose is to encourage us all to move polishes from the untried polish to the normal pile. I know I won't be participating in the ALL challenge, especially because it runs all the way down to July but I'll give it a go when I can fill one the prompts. 

To start off the challenge, no better prompt could have been than glitter. Glitter is awesome, period. I brought out Hyacinth Sparkle by Nubar, a dense lavender glitter with a beautiful buttery, long lasting formula. I've had this since Nov 2012 as part of a 3-pack and I left it on the untried pile because it looked sheer and I'm not the biggest fan of glitter generally. I only need two easy coats to get full coverage and the simple sparkle of the polish made me fall in love with it. 

I have included some swatches below but I didn't just want it leave it at that so I looked some nail art ideas from lack of imagination and settled for the design from this post by Hey, Nice Nails!. I used a black stripper to create the lines on the index finger and added some black square rhinestones on the rest of the fingers to tie it all up. Topped it all off with one coat of HK Girl.


Now for the swatches without topcoat.


I'm really looking forward to the rest of the challenge, especially to some of the later prompts. 

Till next time, 

Laura


Sunday, 6 April 2014

GOT Polish Challenge: Pastel

Well, it's not Thursday today but I can reassure you this post has been in planning since Wednesday night last week. I knew I wanted to use Sweet Hook by China Glaze, my first pastel polish after much resistance from my part, but didn't know how I would use it. After some frustration research, I end up with some saran wrapped, drippy nails. It took me three goes to create the mani you see below from having to do and redo the drips; they would come out crooked, too fat or too chunky. This was an OK try but I actually liked the second one better didn't take photos of it but never mind, I'm happy with the result.


For my last attempt, I started with two coats of China Glaze in Sweet Hook, which has been used a lot in this blog, and let it mostly dry. I then applied one thin coat of Australis' Aqua (please don't judge, it was an early time for this blog) and saran wrapped it off while it was still wet. I then dotted a line of Butter London's Union Jack Black along the tips of the nails and two dots at different levels of the nails to create the drops' base. I let that dry for a few minutes before taking the Topshop Nail Art Pen in Black, tool that I have used almost to the bottom of its container, to smooth out the dotted lines and creating the neck of the drops. It turned out super chunky so I waited for it dry for a while before creating the highlights on the drops with the white Nail Art Pen from Topshop. Once all that was done, I finished with one coat of HK Girl top coat.


This nails were chunky on the tips, I could feel them and it bother me a little but I kept them on overnight. When I woke up, they were a lot smoother and looked nicer, unfortunately I had to go to work before the sun had come up so I couldn't take new photos (mostly from tiredness). When I finished work I had a tiny little bit of tip wear and was tempted to cover it and take new pics but the day got on the way and that thought went out the window. What I figure is that the thick tips protected this mani and allowed me to keep it for a few days before it peeled off in thick, black chunks.


The thing about this mani, even though not perfect, has shown me that I have come a long way in nail art. I used to get frustrated because I couldn't come up with acceptable stuff and would just take it all off without posting anything on this blog. This time, I had basic tools, knowledge of how to use them, better colour theory and most important of all, a lot more patience and persistence to create a funky mani (from afar, it looked better from afar). Who would have thought painting nails would have so many benefits?

Till next time, 

Laura


Wednesday, 2 April 2014

Revlon Parfumerie in China Flower

I have a very soft spot for red polishes. They are classic, easy to wear on their own and there will always be one that suits your skin tone perfectly. When it came to buying the whole collection of Revlon Parfumerie polishes because I obviously had no restraint, I knew China Flower would be one of my favourite ones of the lot by just looking at the colour. It was even better when I opened up the bottle and started painting my nails with it.

China Flower is a leaning-to-coral red crelly, it is opaque and even in ONE coat with a super buttery and quick drying formula. Can I say anything else better about it? The scent is beautiful. I have seen a few mixed reviews on the smell but I'm one of the people that absolutely adores it. The subtle smell is this combination of musk, spice and pepper with none of the sweetness most of the other polishes in the range have. With a name like China Flower one would expect something different but I am pleasantly surprised.


I figured doing plain swatches of this red would be extremely boring for you guys, so I decided to try some cut out nails. I have always love the look of them but my striping skills have only recently improved and I felt the lack of such skills was a big hindrance to me recreating the manicure type properly.


I started with one coat of Essence's Give Me Nude, a super sheer polish that is basically the equivalent of foundation for your nails, and then sticky taped off the sections I wanted to leave nude and got myself painting. I only used one coat China Flower to get the coverage that I did. Once all the polish was dried, I brought out my trustworthy Topshop Nail Art Pen and started lining the perimeter of the nude parts of the nails. I finished it all off with one coat of HK Girl top coat.


I know most cut out manicures have a lot more colours and windows and whatever, but I like the simplicity  of these. They were really fun to wear and sniff when dry even though my lines weren't perfect at a macro scale. It was one of those manicures that looked great from afar and I was the only getting close enough to them and I wasn't worried. Win, win for me. :)


China Flower is a welcome addition to the stash even if I already own something similar without the smell. I would recommend this if you're looking to get on the scented polish wagon as the colour is on the safe side and the smell is subtle enough that you would have to put your hands near your nose to smell it. And you know, you wanna look like an odd lady doing that.

Till next time, 

Laura
Thursday, 27 March 2014

GOT Polish Challenge: Yellow/ Peach

As much as I love the colour yellow, most of us would know how hard it is to work with the formula of this hue of polish; there's always streakiness, bold patches, multiple coats to get the colour even, bad formulas, you name it. I'm glad the GOT challenge included the prompt yellow because it's bright and I have a Golden Oldie one but I hadn't brought out because of some issues mentioned above. It was even better when peach was also included because I had the perfect colour to go with my yellow. 

Not knowing where I was gonna go with this design, I started with three coats of Nubar's Lemon, a ...er, lemon coloured polish that I got in Nov 2012. I love the colour and the formula is quite buttery but it gets a lot of bald spots and it takes foreeeeever to dry. I didn't use any quick drying top coat because I'm not a fan of super thick nail art so I just let it air dry. The tackiness of the polish made me think of the way some people apply foils without glue so I figured it would be a good plan to bring them. I've had most of my foils since I started posting on this blog so if that doesn't fit the theme, I'm not sure what would.


I attempted to apply a Marble foil onto the polish but it seemed the tackiness wasn't the right type to get the foils tuck but it would catch any piece of fluff. Hmm... I free handed a nail foil glue chevron, let it get tacky and stuck the foils. It turned out a lot better than I expected but it wasn't perfect. I feel I need to mention, the wrinkles on the foils came from me rubbing the glue with the brush once dry to put another layer on but it created ridges. part of the charm, right?


Then I remembered I wanted to use Sinful Colors' Hazard as my peach polish. I got it sometime in Dec 2012 and it has been one of those polishes I reach out for when I need something quick, it's almost a one coater and the formula is OK.  Then again, I free handed the chevrons and let them dry. 


The edges of the foils seemed a little too rugged in comparison to the peach lines so I brought out my Topshop Nail Art Pen in White and tidied the edges. It wasn't perfect but it looked better. Once I was happy with the design, I applied two coats of Picture Polish's Revolution to seal the design and the foils.  


Now this design reminds me of two things. The first one being old school pencils, you know the yellow ones with pink rubbers on top; I'm glad I didn't draw the foil edges black or there would have been a lot more resemblance. The second one would this post of mine where I swore to recreate the mani and show it when it came out better. So here it is, unintentionally and not entirely the same, but done. 


I'm quite happy with the result and the fact that I pretty much winged it. Most of the time, when I wing it it turns out baaaad. Anyway, there are some other awesome designs below, so check them out. 

Until next time, 

Laura


Monday, 10 February 2014

Witty Titles Are Hard To Come Up With But I Like My Layered Stamped Mani

At the lack of a good title, I'm just gonna jump right into today's mani. I started with yesterday's base, Rimmel Pro Get  A Nail Tan, and stamped the triangle pattern from BM-423 with Topshop's Gilted. I knew I wanted to layer stamps but choosing a colour and a stamp took me a while, I ended up choosing a half nail, leafy stamp from BM-309 and my oldest polish Maybelline in Succulent. I topped it all of with one coat of Seche Vite.


I'm pretty happy with the result and, at closer inspection, I'm loving how Gilted shows through Succulent, even though the latter is fairly opaque.


Excuse the smudges near the cuticles...


My mum looked at my nails and she mentioned this reminded her of henna tattoos. Looking at it now, it reminds me of the packaging of a particular Australian apple cider. That's how you know where you mind is. :)

Till next time, 

Laura

Friday, 27 December 2013

Abstract New Year's Mani

I don't do festive manicures very well so I figured the best way to start getting better at them was to start doing them... Whatever may come out of those attempts. For my first one, I tried to do a abstract firework inspired mani.


I used two coats of OPI's Skyfall on my index, middel and pinky fingers followed by one dabbed coat of Topshop's Mardi Gras. On my thumb and ring fingers, I used three coats of Essence in the boy Next Door and stamped the what-I-thought-looked-like-fireworks pattern from the BM-213 plate using Topshop's Blitz, Essence's A Piece Of Forever and a polish green shimmer that I can't recall. I topped it all off with one coat of Seche Vite.


A very simple mani and it may not scream 'New Year' but for a first attempt it doesn't look too bad.

Till next time, 

Laura

Friday, 22 November 2013

33 Day Challenge: Mani with Three Patterns

I'm back on the challenge after neglecting it for the last week. It's not that I haven't wanted to do it, my inspiration just went out the window and I haven't been able to catch it back. Anyway, I didn't want to miss another prompt that I would have to do later so I gave myself a deadline for today's prompt of a mani with three patterns. I wanted to do some free-handed nail art but I knew it was not gonna happen within my time limit and that frustration would be likely to get the better of me so I opted for stamping. 

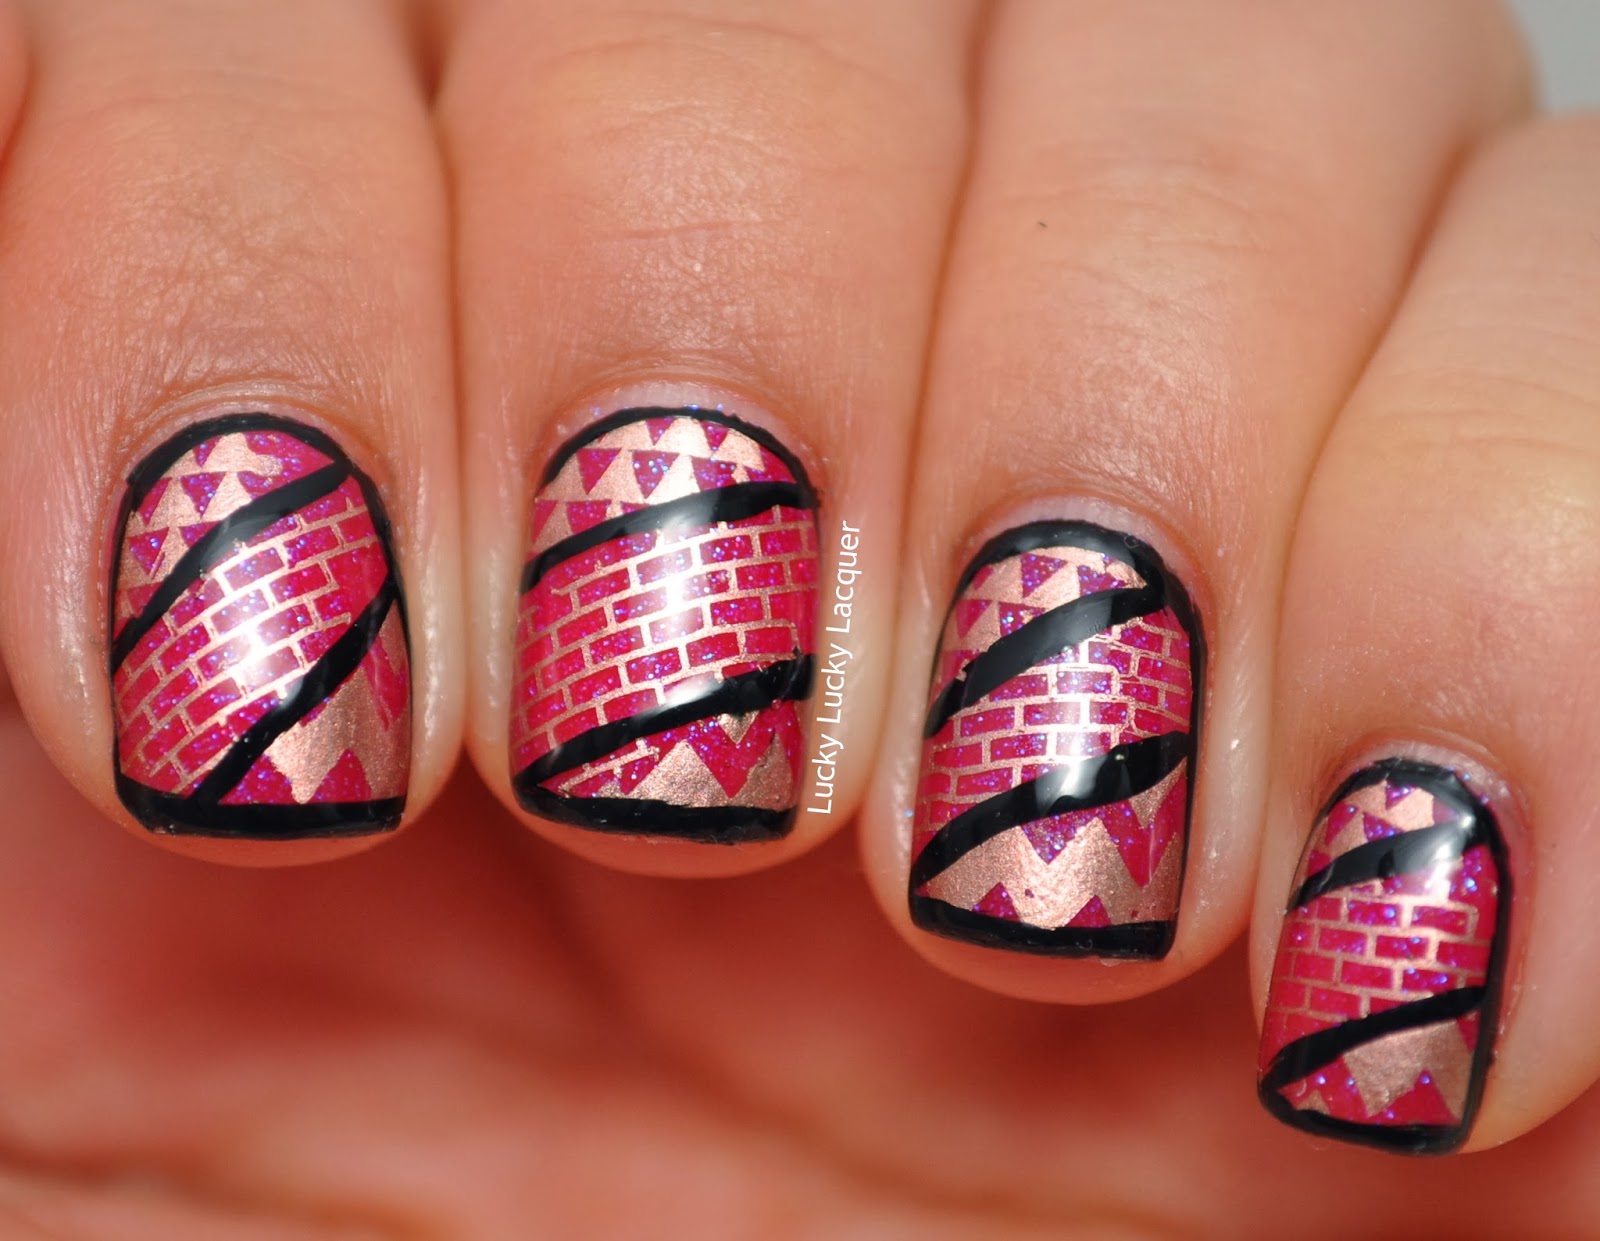
So here it is, my three patterned mani. I used three coats of Butter London's Disco Biscuit and a coat of Seche Vite as a base. I actually wore this beautiful pink jelly for a whole day by itself before I added the nail art. I tried taking photos of the scattered holo glitter it contains but my camera's battery died as I was pressing the shutter button. :( While the battery was charging, I went on with the mani and taped up sections of my fingers and started stamping chevron, brick and triangle patters from the BM-422 and BM-423 plates with Essie's Penny Talk.


I had a lot of trouble getting the brick pattern to stick to the pink base and had to redo it A LOT of times, however, I didn't have to redo the base because I discovered that I could use fresh sticky tape to remove the half done job of the base. I would just put the sticky side on the nail and it would remove the stamping polish in no time and no acetone. Phew! I don't think it would work with all polishes but it's a handy thing to know...


When I finally managed to get the patterns on my nails (almost) wholly, I used my trustworthy Topshop black stripper and to frame the nails and create lines along the edge of the patterns. They weren't very clear to begin with and I thought the line would make it look better. I'm undecided on that one. I topped it all off with a coat of Seche Vite.


Overall, I'm not blown away by my nail art but this is the first time I have successfully managed to frame my nails with a striper. I'm aware the lines on the inside of the frames are uneven but I know practice would help me out with that one. Maybe if I had a different picture to frame, I would be happier. :)

Check out the other ladies' manis for today's prompt.


If you've been on this blog before, you may notice I have different background and a slightly different layout. The thing that bother me the most with my last background I used was the lack of continuity on mobile devices, like tablets, and bigger, higher resolution  computer screens. I also wanted to add social media buttons to the side bar and the free icons (found here) looked better with the multicoloured chevron pattern. :) I'm not web designer but I'm trying to learn to learn little bits as I go, including what looks good and what doesn't. I really like feedback or suggestions so if you have any thoughts on my layout, please let me know!!!

Till next time, 

Laura

Thursday, 14 November 2013

33 Day Challenge: Geometric

This idea I had of catching up on the challenge this week sort of went out the window and I happen to be running a day late with the prompts that I haven't skipped. Anyway, the prompt for day 23 for the challenge was geometric. I'm trying to stay away from just stamping as much as I can so I was a bit short of ideas. I had this triangular origami box lying around and I thought that would be a good, simple idea to recreate. OK, so the execution wasn't great and I managed to take a chunk of polish of the green part on the index finger as I putting the bottle of topcoat back in its place but I figured it was still decent enough to put it up (and I didn't want to miss another prompt).

I started with two coats of Essence's Piece of Forever, let it dry then used striping to create a triangle. I painted W7's It's Pink, Max Factor's Purple Haze and Ulta3's Frog Prince outside each side of the triangle and used a Topshop black stripper for the inside lines. I topped it all off with one coat of Seche Vite.


This is the box I based the mani on, I couldn't figure out how to photograph the whole box in my tiny lightbox so I'm just showing you the colours. It's also a bit crumpled from handling it for photographs, so excuse the wrinkles.


I wasn't overly happy with the mani but it was fun to wear for a few hours. Yes, I have taken it off already and started on tomorrow's mani, which means that I may be on time.


Tuesday, 12 November 2013

33 Day Challenge: 3 Colour Gradient and Pattern

I'm back on the challenge which means I have a lot more free time to play with polishes :). I was a bit conflicted with the three colour gradient and a pattern prompt for day 22 of the challenge because my gradient attempts can be a bit of a hit and miss and I had just done an awesome one a couple of weeks ago. I created a three colour gradient last night but it turned out to be a miss and I couldn't recycle the last one because it didn't have a pattern plus that's not really the point of a challenge, is it?

I stuck to what I knew would work for me and chose three Topshop polishes for the gradient and striping tape. I started with a two-coat base of Queen of Green (QoG), which you may have guessed is the green closest to the cuticle. I then sponged on, from cuticle to tip, QoG, Wisdom and Zodiac and smoothed out the gradient with a coat of Seche Vite. I  wanted to put a little extra effort on the pattern side of the prompt so I tried to create some triangles with striping tape but as I was putting on the tape on my ring finger, I knew the triangles (some just polygons) weren't gonna be regular shapes. I applied one coat of Ulta3 in Black Satin over the tape and sealed it with one last coat of Seche Vite.


I wish I had done the green strip a little bigger so the difference between Zodiac and QoG would a little clearer. QoG is a silver based pastel green shimmer and Zodiac is greenish gunmetal grey shimmer with gold bits in it and they are both beautiful but I couldn't quite capture the beauty of them.


Or did I?


I really like the way this mani looks but it was a pain in the ass to clean up. Have you ever tried to clean shimmer polishes? The shimmer goes everywhere and it sticks to the skin like nothing else. I used PVA around my cuticles to avoid some of the mess but the cuticle lines weren't as clean as I'd like them so I took out the acetone. Bad move. After I managed to get as much of the shimmer of my fingers as I could with clean up brushes and cotton rounds, I still had silver bits all over my fingers. I had to use a nail brush to scrub up my fingers and use some cuticle remover to get rid of the stray shimmer. Lesson learnt: If I'm playing with shimmer polishes, I need to be ready to do a lot of clean up.


I just realised tomorrow's prompt is geometric but hopefully I can come up with something good and get my nail mojo back. Till then, check out the other timely participants of the challenge.


Till next time, 

Laura

LinkWithin

Related Posts Plugin for WordPress, Blogger...