Saturday, 10 November 2012

Australis Aqua

As we all may know, Pinterest can be such an inspiration for cooking, decorating, art, nail polish... So i jumped on it to get some sort of colour inspiration and long story short, I ended up checking out these shoes from Sole Society. I am a bit of an impulse buyer and almost, almost bought them but decided to wear the colours on my nails. After all that's the reason I jumped on Pinterest.
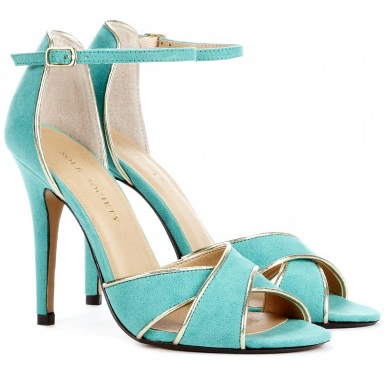

Aren't they pretty? I really wish I had lots of places to go to so I could justify spending money on beautiful shoes. So here's my interpretation.


I know, really straight forward but after all my failed attempts last week, this is rather enjoyable. The blue is actually an aqua colour but I don't seem to get the colours right with my camera sometimes. This polish is the happy medium between green and blue. 

Polishes used:
Blue: Australis Nail Colour in Aqua. If this isn't an original name, I don't know what is.
Top Coat: Sally Hansen Insta-Dri

The striping tape I got on eBay from this seller. I got 18 rolls of different colours for $2.60 ages ago. At the time of posting, the seller had similar offers for purchase. Mine came from China and took a little over two weeks to get here but the wait was worth the quality, quantity and price.

I'm gonna check out some more Pinterest pictures for future inspiration. 

Till next time, 

Laura

Friday, 9 November 2012

Too Random Skittle

I've had a few terrible manicures in the last couple of days that were not even worth photographing. I'm talking about extremely flooded cuticles that couldn't be fixed, crooked stamping, smudging of such said stamping, terrible colour combinations and bad gradients. 

This is the first one that looked sort of OK, even though I'm not completely satisfied with the result. I tried using differents textures ( a cream, a metallic and a glitter) in blue, green and pink that I thought would look good together as a skittle mani. Tried tying it all up by having a striped middle finger but the job was kinda dodgy and there's a piece of stray glitter on my ring finger that I couldn't remove!!!!

Anyway, I'll do and learn but here are the pictures.


The obliged matte top coat, which in my opinion, makes polish look a million times better. 


Polishes used:
Pink: B Collection by Bloom in Cologne 
Blue Glitter: Essence in Blue Addicted
Metallic Duochrome: Topshop in Eclipse
Top Coat:   1st pic: Sally Hansen Insta-Dri
                 2nd pic: Rimmel Pro Matte Finish

There you have it. I'm gonna Google Colour Theory and maybe learn a little about what looks good together and keep practicing with that tape.

Till next time, 

Laura


Saturday, 3 November 2012

Not So Afraid Of The Marble Anymore

I went to Big W yesterday in search of a new foundation but stumbled upon their massive beauty sale. I found Max Factor's mini bottles for 72 cents. Yeah, that's right. When have I seen such prices for ANY brand of polish on Australia? Never! There were only three colours left so I picked them up and turn around to start running to the checkouts. 

However, in my way, I came across the Face of Australia stand. I'm not a massive fan of their formula as it takes a while to dry but every so often they come up with decent collections and fairly nice colours. Their last one is called Pastels (innovative, right?) and each bottle was $1.94. Woohoo!! I grabbed 6 out f the 7 colours of the collection and ran off to pay. 

When I got home, I took my little $14.52 stash of nail polish and then realised I didn't really like pastels. There was a reason why I never had any before!!! So I had to think of how to use them all at once and the idea of a marble popped up. I brought out my plastic cup of water and started playing with the colours and come up with something I'm actually proud of.


Look at my ring finger. Yeah, I like it.


And some more detail of my index and middle finger (excuse the bubble).


Polishes used:
All Face of Australia
Pink: I'll Take You To The Candy Shop
Purple: Boys 'N' Berries
Blue/Green: After Dinner Mint

I applied the pink polish as a base and added the three colours to the water. The beauty I found with these three polishes is that they took about a minute or so to dry up on the surface of the water so there was quite a bit time to play around with the shapes. I was also really easy to clean up. I didn't use sticky tape or Vaseline to protect my fingers but I managed to just wipe the polish off my skin with some cotton. I found some tiny bubbles from not drying my fingers quickly enough but they're barely noticeable in real life.

I originally intended to use all all six colours for the marble but the yellow and orange polishes from the collection would dissolve in the water by themselves but wouldn't let the other polishes dissolve and dry out really quickly. Really strange considering when when I combined only the yellow and orange, they would play nice and actually create a marble. 

 So, Face of Australia polishes have shown me the beauty of the marble and how I shouldn't be so afraid. Hmm... I wonder what other colours I can try.

Till next time, 

Laura

Thursday, 1 November 2012

The Gold Crackle

I'm sure I'm not the only one that got caught in the crackle fad and bought a heap of different colours because the black one was so cool and innovative. Well, now that phase has well and truly passed and I have don't-want-to-count-how-many bottles of crackle, I thought I start getting creative with them. 

I saw this video a few weeks ago and this is what prompted me to get the crackles out and work with them in a different way. I really loved how shiny the glitter in OPI Gold Crackle and decided to work with that one. First I tried to paint it on sticky tape a la The Beauty Department but I found, once dry, the polish was inflexible and would come off the tape. I tried cutting this dried polish into shapes but my hands and scissors were too big for the strip, so I just ended up crushing it and throwing it in the bin.

I also tried stamping with it but it was a major fail. Lesson learnt.

Today I came across this other blog, Konad Addict, where the crackle polish is sponged onto the nail with some rather amazing results. Yes, I am using other people's ideas but I really have no practical creativity, which I guess this blog may help me out with( I hope).

So here it is, my sponged-on crackle over pink. It is so sparkly and shiny in real life I can't stop looking at it. The combination of colours also reminded me of a Disney princess or Barbie colours. It is sooooo cool even though it looks like a normal glitter gradient. I didn't really crack either. There's only two minor ones on my index finger.

Polishes used:

Gold: OPI in Gold Crackle
Pink: OPI in If You Moust You Moust
Top Coat: Essence XXXL Shine Gel-Look and Sally Hansen Insta-Dri


The photos don't do the glitter justice on how sparkly it is and that pink, that pink is  impossible for me to photograph. I've tried every setting and light possible but to no avail. The middle photo would be the closest I managed to get it to the actual colour.

That's all from me today.

Till next time, 

Laura

Wednesday, 31 October 2012

Layla Mirror Effects Tape Mani *Edited*

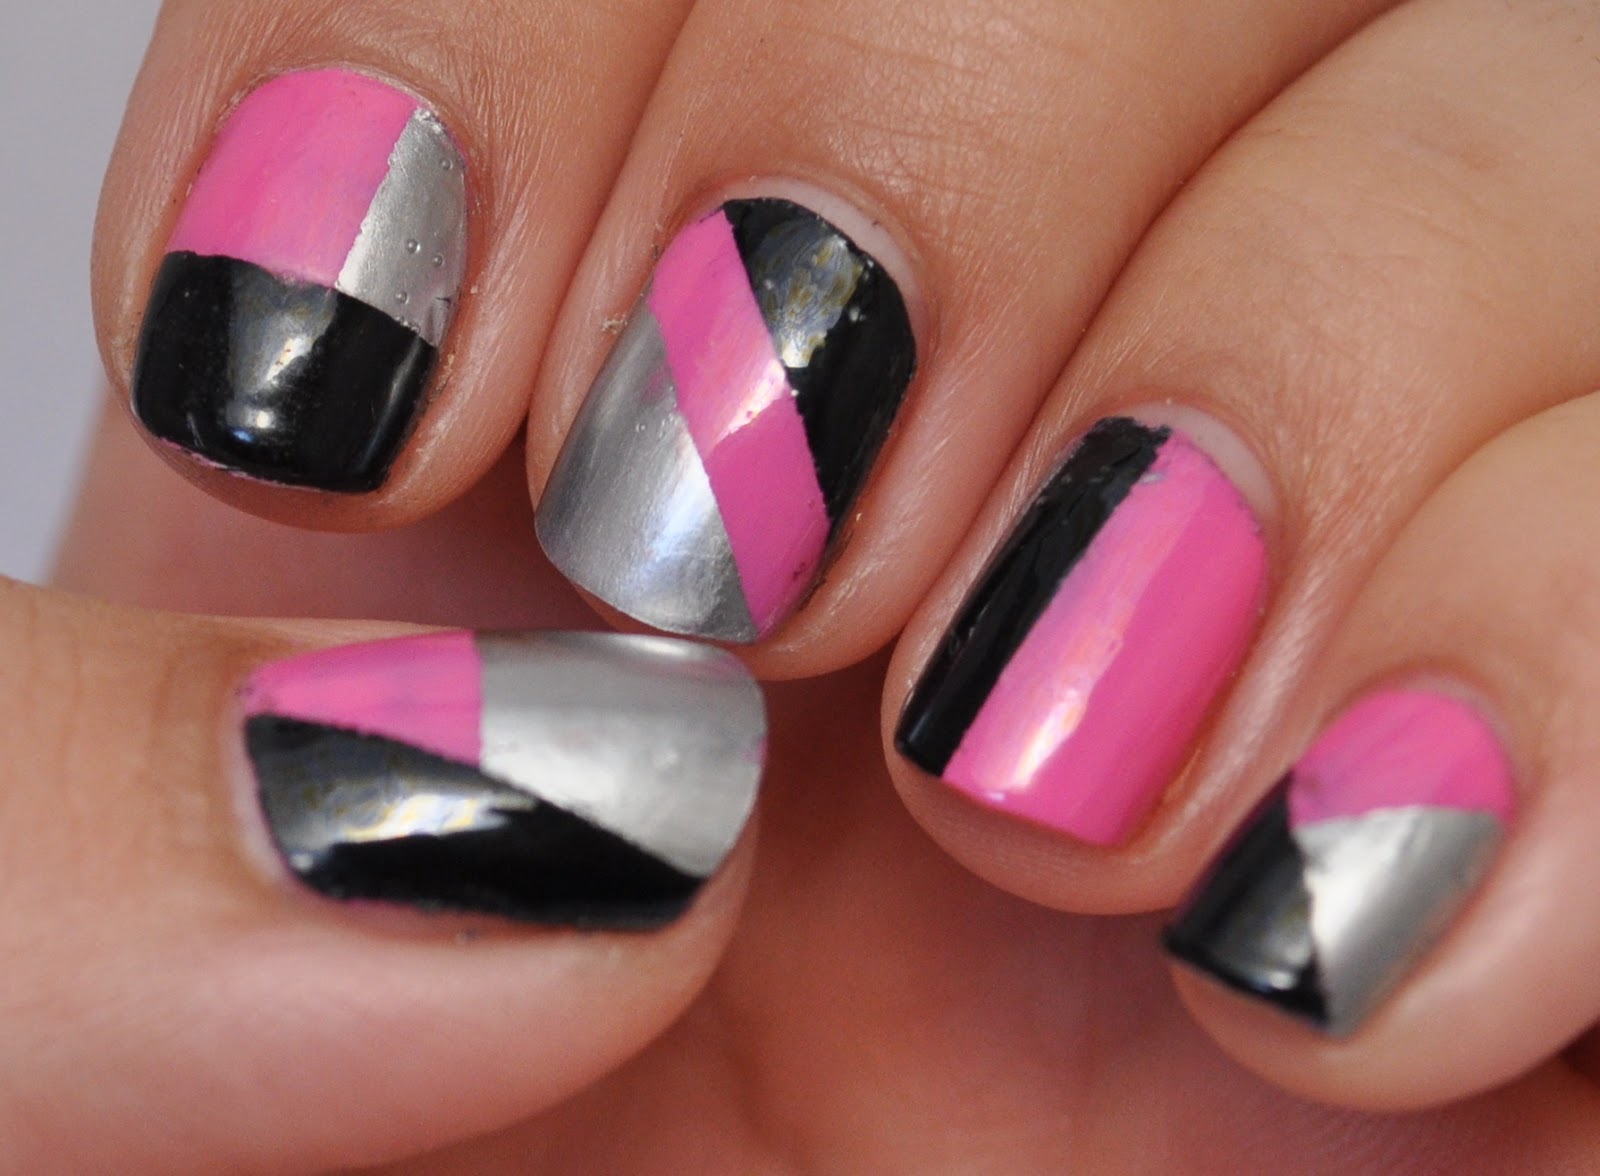
When in doubt, reach out for the sticky tape... Yes, I'm bad at rhyming but the idea stays true. This mani is not my finest work, the lines aren't that crisp, the pink is quite patchy, the clean up left a lot to be desired, the top coat created bubbles. If you squint your eyes, it looks ok. :)

Polishes used:
Pink: OPI in If You Moust You Moust 
Silver: Layla Mirror Effects in Metal Chrome 
Black: Ulta3 in Black Satin 
Top Coat: Sally Hansen Insta-Dri


The pink polish belongs to the Minnie Mouse collection by OPI and I really like the colour. 
I originally got a mini bottle  but love it so much that I got a full size bottle. However, both bottles are very streaky and the mini bottle has gotten fairly thick, which didn't help with the application. 

******Edit******
I had to add a matte top coat to this mani. I think I may be in absolute and utter love with Rimmel Pro Matte Top Coat. It looks everything look so... soft and dreamy. and it doesn't streak like every other matte top coat I've tried. 


**************
Leaving it very short today, 

Til next time, 

Laura

LinkWithin

Related Posts Plugin for WordPress, Blogger...